How to Inspect Hand Tools for Wear and Tear: The Complete Safety Guide
That hammer with the cracked handle in your toolbox isn’t just annoying. It’s a liability waiting to happen.
From the BLS findings, it is observed that every year, close to hundred thousand workers are injured due to hand tools related issues. Also, defective tools responsible for 8% of the office injuries annually, such injury places are now distant and there are far-reaching consequences. The financial implication of bills, loss amalgamates, disabled labors, OSHA and medical litigations taking place may make failures costing less than a six figure amount change to that much or even more in cost.
As the person in charge of tool safety whether in a professional setting, at your workstation, or while working in your personal space, you already know the significance of the inspections. But, do you know how? Is it possible to tell the broad warning signs the distinguish the inadequate maintenance work from the one where you can pass the still working too to the bin?
This handbook will walk you through the process of inspection to identify wear and tear before it escalates into something that may cause accidents. You shall be privy to the protocols as advised by OSHA, how to warn against impending malfunctions and the hurtles in deciding to repair and when it should be changed. Before long you will have a very effective mechanism that helps you prevent accidents from happening as regard to your tools, your team and even your business.
Why Hand Tool Inspection Matters More Than You Think
The Real Cost of Defective Tools
When in early 2024 Marcus commenced operations of his renovation trade, he economized by using old tools. Some six months later, Marcus crew member working with an old claw hammer found out to his detriment that the head crashed in the heat of work. OSHA inspection also discovered three more defective tools in Marcus′sinventory and so hired some medical services resulting in fines of $18,000 and suspension of the employee from work for three weeks.
This story isn’t unusual. Hand tool injuries carry serious financial consequences:
- Direct medical costs: Average 35,000−35,000−50,000 per serious hand injury
- Workers’ compensation claims: Tool-related injuries average 21 days away from work
- OSHA penalties: Up to 16,550 perserious violation, 16,550 perserious violation, 165,514 for willful violations (2025 rates)
- Lost productivity: Downtime from accidents affects project timelines and client relationships
- Insurance premiums: Incident history impacts your experience modification rate
That is to say, the National Safety Council claims that every year where is up to $176.5 billion that American companies lose because of accidents at work. But not all the accidents employed in this figure are related to hand tools – after all, these are so-called “minor” accidents.
Legal and Compliance Requirements
OSHA has also put in place fixed rules to protect the use of hand tools for every employer. These requirements are the basis for every employer’s argument in case of an accident.
Construction Industry (29 CFR 1926.301):
- Employers must ensure all hand tools are maintained in a safe condition
- Tools with defects must be marked or tagged and removed from service immediately
- Impact tools must be kept free of mushroomed heads
- Wooden handles must be kept free of splinters or cracks
General Industry (29 CFR 1910.241-244):
- Tools must be inspected before each use
- Defective tools must not be used until repaired
- Specific requirements for wrenches, chisels, and other common hand tools
Key Legal Principle: Even if workers bring their own tools to work, employers have the duty to ensure that the tools are safe for use. You cannot entrust the safety of the tools to specific employees because once you do re in breach of your obligations.
Want to ensure you’re fully compliant? Understanding OSHA hand tool requirements is your first step toward building a defensible safety program.
When to Inspect Hand Tools: Building Your Inspection Schedule

Not all health and safety checks are structured in the same way. Based on the level of probability and impact, the volume of checks must correspond to the respective risk. The compliance needs must also be taken into account in determining the performance monitoring frequency.
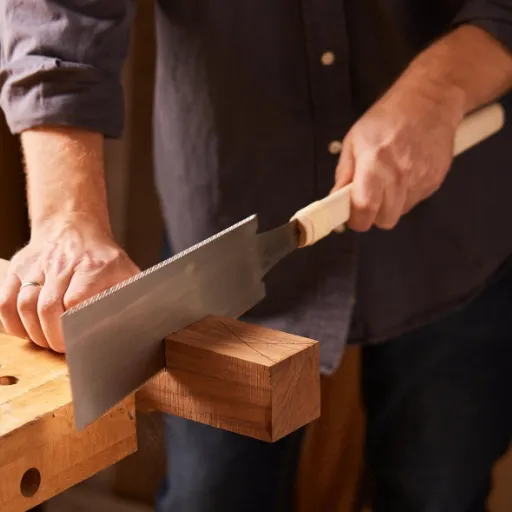
Pre-Use Inspection: The Five-Minute Safety Check
The importance of operational checks cannot be understated. Every piece of equipment should be checked prior to carrying it out of the stores. You might think that spurious as it can be done easily in less than five minutes by a competent person performing such an inspection. The criteria is the ability to examine in detail and determine within a short period of time what is wrong with the equipment.
The 30-Second Visual Scan:
- Look for obvious cracks, chips, or damage
- Check handle attachment
- Verify moving parts function smoothly
- Confirm cutting edges are intact
- Look for signs of previous repairs
When to do it: Before starting any task, every single time.
Who does it: The person using the tool. Never assume a tool is safe because someone else used it recently.
Periodic Inspections: Scheduled Deep Checks
Beyond daily checks, formal inspections should happen on a schedule:
Weekly Supervisor Checks:
- Review all tools in active use
- Verify documentation is current
- Check for tools that should have been removed from service
- Time required: 15-30 minutes per crew
Monthly Formal Inspections:
- Detailed examination of all tools
- Measurement of wear indicators (jaw spread on wrenches, blade thickness on cutting tools)
- Documentation of findings
- Replacement decisions for borderline tools
- Time required: 1-2 hours depending on tool inventory
Annual Comprehensive Audits:
- Complete inventory of all hand tools
- Comparison against purchase records
- Analysis of tool failure patterns
- Review and update inspection procedures
- Budget planning for replacements
Pro Tip: Align your inspection schedule with your busiest seasons. Check construction tools before spring building season starts. Audit manufacturing tools during planned maintenance shutdowns.
How to Inspect Hand Tools: The Step-by-Step Process
A systematic approach ensures nothing gets missed. Follow this workflow for every inspection, whether it’s a quick pre-use check or a detailed monthly review.
Step 1: Visual Examination
Start with the big picture. Hold the tool at arm’s length and look for:
- Cracks or fractures in metal components
- Bends or deformation that changes the tool’s original shape
- Chips or missing pieces from cutting edges or striking surfaces
- Rust or corrosion that weakens structural integrity
- Previous repairs that may be failing
- Foreign material stuck to the tool that could affect performance
Red Flag: Any crack in a load-bearing component means immediate removal from service. Hairline cracks spread under stress and cause catastrophic failure.
Step 2: Handle and Grip Assessment
The handle is often the first component to fail, and handle failures cause the most injuries.
Wooden Handles:
- Check for splits, splinters, or cracks along the grain
- Verify tight fit in the tool head (no wobble)
- Look for signs of rot or water damage
- Confirm the wedge securing the head is intact
Fiberglass or Composite Handles:
- Inspect for cracks, delamination, or fiber separation
- Check for UV damage (fading, brittleness)
- Verify the head attachment hasn’t loosened
Rubber or Plastic Grips:
- Look for tears, holes, or excessive wear
- Check for chemical damage (swelling, softening)
- Verify the grip hasn’t slipped or rotated
Critical Warning: Tape on a handle is never acceptable. Tape hides damage and can give a false sense of security. If a handle needs tape, the tool needs replacement.
Step 3: Functional Testing
Visual inspection tells part of the story. Functional testing reveals problems you can’t see.
For Striking Tools (Hammers, Mallets):
- Test the head-to-handle connection with light taps
- Listen for rattling or looseness
- Check balance (the tool shouldn’t feel head-heavy or handle-heavy)
For Wrenches and Pliers:
- Open and close the jaws through full range of motion
- Test the adjustment mechanism on adjustable wrenches
- Check for binding or grinding in pivot points
For Cutting Tools:
- Test blade movement on folding knives and utility knives
- Verify locking mechanisms engage securely
- Check for blade wobble in fixed-blade tools
For Files and Rasps:
- Confirm teeth are sharp and not clogged with material
- Test cutting action on a scrap piece
Step 4: Edge and Surface Condition
Cutting edges and striking surfaces require special attention.
Cutting Edges:
- Should be sharp and free of chips
- No rolled edges or deformation
- No cracks extending from the edge into the body
Striking Surfaces:
- Must be flat and perpendicular to the handle
- No mushrooming (spreading or deformation from repeated impacts)
- No chips or cracks in the face
Measuring Wear: For critical instruments’ perform inspection and use gauges to determine wear. For wrench jaws which went out of specification by more than 1/16 inch it is necessary to replace them. Chisel edges worn more than 70% of original thickness should be sharpened or changed.
Step 5: Documentation
Every formal inspection needs documentation. Your records prove compliance and help identify patterns.
What to Document:
- Date and inspector name
- Tool identification (type, brand, model, asset number if applicable)
- Inspection findings (pass/fail with specific details)
- Actions taken (returned to service, repaired, or scrapped)
- Next inspection due date
Digital vs. Paper: Digital systems facilitate searching and analysis of trends. Paper-based checklists are sufficient for less complicated plants. Select the one system that your team will employ regularly.
Need a ready-to-use inspection checklist? Our hand tool inspection checklist covers every major tool type with specific pass/fail criteria you can use immediately.
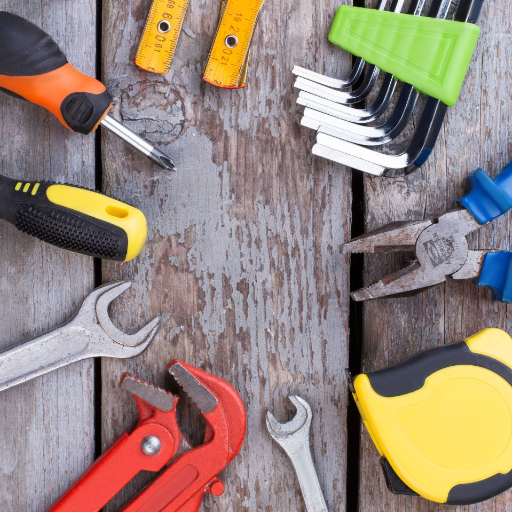
Tool-Specific Wear Indicators: What to Look For

Different tools fail in different ways. Knowing the specific warning signs for each tool type helps you catch problems before they cause accidents.
Hammers
Hammers cause more injuries than any other hand tool category. Most failures involve the handle or head attachment.
Handle Failures:
- Cracks along the grain: These propagate under stress and cause sudden breaks
- Loose head: Any wobble means the wedge has failed
- Splinters: Indicate drying and weakening of the wood
- Chemical damage: Oil or solvent exposure softens wood fibers
Head Problems:
- Face mushrooming: The striking surface spreads and can chip off dangerous fragments
- Claw damage: Bent or cracked claws can snap under prying force
- Eye elongation: The hole through the head becomes oval, allowing the head to loosen
The Squeeze Test: Grip the handle near the head and try to twist it. Any movement indicates a loose fit that needs immediate attention.
Screwdrivers
Screwdriver failures often happen when worn tips slip out of screw heads, causing hand injuries.
Tip Wear:
- Rounded edges: The tip should have sharp, square edges matching the screw type
- Twisted shank: Indicates using the screwdriver as a pry bar
- Chipped tip: Creates poor engagement with screws
Handle Issues:
- Cracks or chips: Reduce grip and can cut hands
- Loose shank: The metal shaft should be firmly anchored in the handle
- Oil saturation: Makes the handle slippery and unsafe
Warning Sign: If you find yourself pressing harder to keep the screwdriver engaged, the tip is worn and needs replacement.
Wrenches
Worn wrenches are dangerous because they slip unexpectedly, often causing hand injuries when you hit nearby objects.
Jaw Wear:
- Sprung jaws: The opening is wider than specification, reducing grip
- Rounded corners: The edges that engage fasteners become smooth
- Twisted body: Indicates using the wrench as a hammer or lever
Adjustment Mechanism (Adjustable Wrenches):
- Worn threads: The adjustment doesn’t hold position
- Slipping jaws: Won’t maintain setting under load
- Binding: Indicates damage or corrosion in the mechanism
Quick Check: Try the wrench on a known-good fastener. Any slipping means the wrench needs replacement.
Chisels and Punches
These struck tools present unique hazards because they concentrate force on small areas.
Mushroomed Heads (Critical!):
- The head spreads and develops a raised lip around the edge
- This lip can break off as a high-velocity projectile
- OSHA specifically prohibits using tools with mushroomed heads
- Fix: Grind the head flat if sufficient material remains, otherwise replace
Edge Condition:
- Chips or cracks: Any break in the cutting edge creates stress risers
- Dull edges: Require more force, increasing accident risk
- Burrs: Raised metal along the edge can cut hands
Handle Requirements:
- Must have a handguard or mushroom-shaped end to prevent hand from sliding onto the blade
- Wooden handles must be tight and free of cracks
- Missing handles are never acceptable
Pliers
Pliers fail gradually, making regular inspection essential.
Jaw Wear:
- Smooth gripping surfaces: Teeth wear down and lose holding power
- Misalignment: Jaws don’t meet evenly when closed
- Cracks at stress points: Usually near the pivot or jaw tips
Pivot Problems:
- Looseness: Jaws wobble when closed
- Binding: Won’t open and close smoothly
- Corrosion: Rust indicates inadequate maintenance
Insulation Damage (For Electrician’s Pliers):
- Any cut, tear, or abrasion in the insulating grip
- Fading that indicates UV or chemical damage
- Slippery surface from oil or grease
Important: Damaged insulation on electrical tools creates electrocution hazards. These tools need immediate removal from service.
Files and Rasps
Files seem simple but have specific failure modes.
Tooth Condition:
- Clogged teeth: Material packed between teeth prevents cutting
- Worn teeth: Files don’t cut effectively when dull
- Chipped edges: Reduce effectiveness and create sharp projections
Tang and Handle:
- Sharp tang: The pointed end that inserts into the handle must be covered
- Loose handle: Can come off during use, causing hand injuries
- Missing handle: Never use a file without a proper handle
Cleaning Check: Files can’t be sharpened. When cleaning doesn’t restore cutting ability, replacement is the only option.
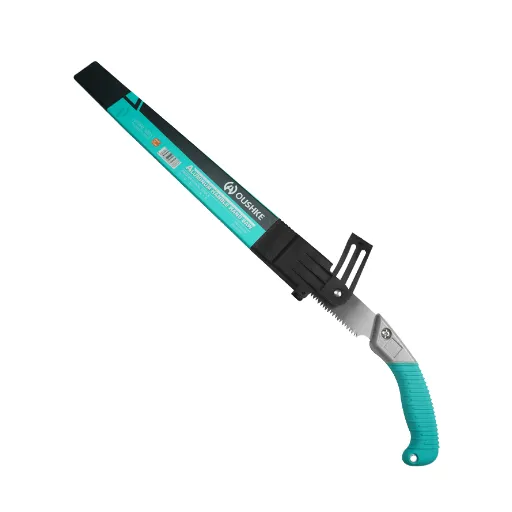
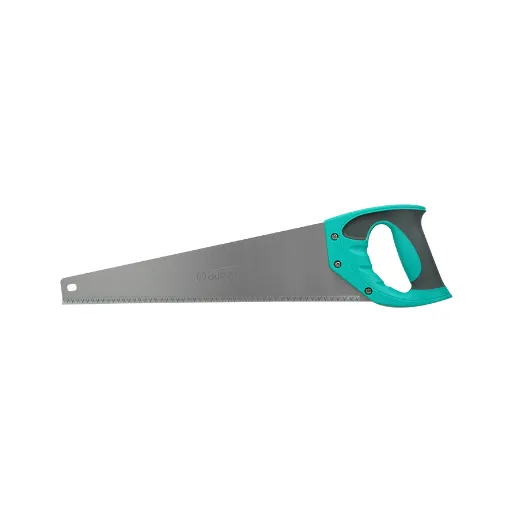
Cutting Tools (Knives, Saws, Snips)
Sharp tools are safe tools. Dull cutting tools require more force and are more likely to slip.
Blade Condition:
- Dull edges: Require inspection under good light to detect
- Chips or cracks: Any break in the blade edge is dangerous
- Bent blades: Indicate using the tool for purposes it wasn’t designed for
Locking Mechanisms (Folding Tools):
- Must engage positively with an audible click
- No movement when locked open
- Release button functions smoothly
Handle Integrity:
- Secure attachment to the blade
- No cracks that could cause the handle to separate
- Comfortable, non-slip grip surface
Ready to upgrade your cutting tools? Proper storage extends tool life significantly. Learn how to store hand tools properly to prevent the damage you’re now inspecting for.
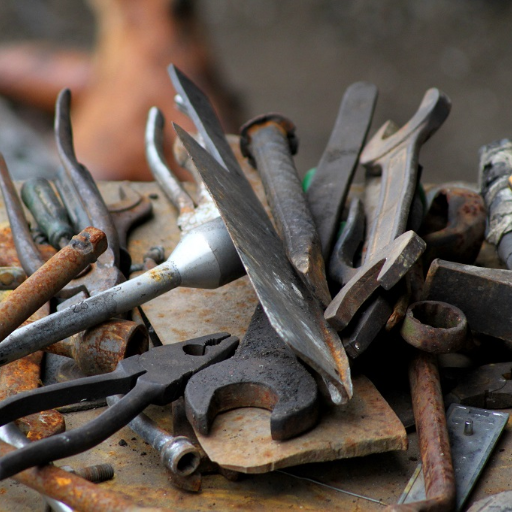
Warning Signs: When to Replace vs. Repair
Not every damaged tool needs replacement. Knowing when repair is safe and when replacement is necessary saves money while maintaining safety.
Replace Immediately: No Exceptions
These conditions mean the tool goes straight to the scrap bin:
Structural Damage:
- Cracks in load-bearing components
- Bent metal that has been straightened (weakened structure)
- Broken welds or braze joints
- Corrosion that has visibly reduced cross-section
Critical Wear:
- Mushroomed heads on struck tools that can’t be adequately ground down
- Wrench jaws sprung beyond specification
- Screwdriver tips worn more than 50%
- Pliers with cracks near the pivot
Safety Compromises:
- Electrical tools with damaged insulation
- Tools with previous failed repairs
- Tools missing safety guards or handles
- Any tool that has caused a near-miss incident
The Cost Test: If repair costs more than 50% of replacement cost, replace. The safety margin isn’t worth the savings.
Repair Possible: When Restoration Makes Sense
Some problems can be fixed safely:
Handle Replacement:
- Wooden handles can be replaced if the tool head is sound
- Wedges must be installed properly (not nails or screws)
- Replacement handles must meet original specifications
Sharpening:
- Chisels, plane blades, and knives can be sharpened repeatedly
- Follow original bevel angles
- Remove minimum material necessary
Cleaning and Rust Removal:
- Surface rust can be removed with wire brushes or chemical treatments
- Metal must be inspected after cleaning to ensure no pitting
- Oil after cleaning to prevent recurrence
Minor Adjustments:
- Loose pivot pins in pliers can sometimes be peened
- Binding mechanisms can be cleaned and lubricated
- Bent components can be straightened if they weren’t overstressed
The Decision Matrix
Use this framework when the decision isn’t obvious:
| Factor | Repair | Replace |
|---|---|---|
| Cost to repair | Under 30% of replacement | Over 50% of replacement |
| Tool value | High-quality, expensive | Inexpensive, commodity |
| Safety criticality | Low to moderate | High (electrical, struck tools) |
| Damage location | Non-critical component | Load-bearing or edge |
| Previous repairs | None | One or more already |
| Failure consequence | Minor injury possible | Serious injury likely |
When in Doubt: Replace. The cost of a new tool is trivial compared to the cost of an accident.
Proper Documentation and Tracking
Good records protect you legally and help you manage your tool inventory efficiently.
What to Document
Inspection Records Should Include:
- Date and time of inspection
- Inspector name and qualification
- Tool identification (type, brand, model, serial/asset number)
- Location where tool is used
- Specific findings (not just “pass” or “fail”)
- Photographs of any defects found
- Action taken (returned to service, repaired, scrapped)
- Next inspection date
Retention Requirements:
- OSHA requires records be kept for the duration of employment plus 30 years for occupational injuries
- Inspection records: minimum 3-5 years
- Training records: duration of employment plus 30 years
- Incident reports: permanently
Defective Tool Procedures
When you find a defective tool, immediate action prevents accidental use.
Tagging Protocol:
- Remove the tool from service immediately
- Attach a “DO NOT USE” tag with date and inspector name
- Record the defect in your tracking system
- Store the tool in a locked or separate area
- Notify supervision of the defect
Tag Information:
- “DO NOT USE – DEFECTIVE” in large, clear letters
- Date discovered
- Inspector name
- Brief description of the defect
- Disposition (awaiting repair, awaiting disposal, etc.)
Disposal:
- Defective tools must be destroyed or rendered inoperable before disposal
- Simply throwing them in the trash risks someone retrieving and using them
- Cut cords on electrical tools, bend handles on hand tools, or use a bandsaw to cut through metal components
Digital vs. Paper Tracking Systems
Paper Systems:
- Simple and inexpensive
- No technology barriers for field crews
- Physical backup that’s hard to accidentally delete
- Harder to search and analyze trends
Digital Systems:
- Easy searching and reporting
- Automatic reminders for inspection due dates
- Photo documentation capabilities
- Trend analysis to predict failures
- Requires devices and technical comfort
Hybrid Approach: Many companies use tablets for inspections in the shop but keep paper checklists available for field use. Choose what works for your team.
Best Practices for Tool Longevity
Preventing damage extends tool life and reduces inspection failures.
Proper Storage
Environmental Control:
- Store in dry locations to prevent rust
- Avoid temperature extremes that affect handles
- Keep away from direct sunlight that degrades plastics and rubber
Organization:
- Use toolboxes, chests, or shadow boards
- Prevent tools from contacting each other (prevents edge damage)
- Secure storage prevents falls and impacts
Special Care:
- Sharp tools need blade guards or sheaths
- Precision tools need protective cases
- Electrical tools need cord management to prevent insulation damage
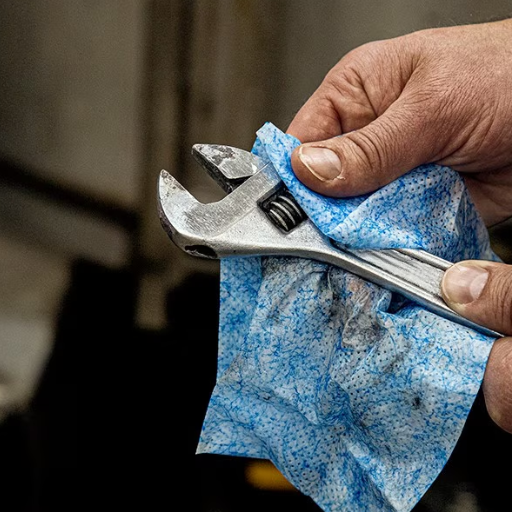
Regular Cleaning
After Each Use:
- Wipe off dirt, grease, and debris
- Clean cutting edges to prevent corrosion
- Remove concrete, plaster, or other materials that harden
Periodic Deep Cleaning:
- Disassemble if possible and clean components
- Remove rust with appropriate methods
- Oil metal surfaces to prevent corrosion
- Treat wooden handles with linseed oil
Correct Usage
The Golden Rule: Use the right tool for the job. Misuse causes most tool damage.
Common Misuses to Prevent:
- Using screwdrivers as pry bars or chisels
- Using wrenches as hammers
- Using pliers on hardened fasteners
- Using extension pipes on wrenches for extra leverage
- Using dull cutting tools
Training: Workers must be trained on proper tool use, not just expected to know. Document this training.
Preventive Maintenance
Scheduled Maintenance Tasks:
- Sharpen cutting tools before they become completely dull
- Tighten loose handles before they fail
- Oil pivot points on pliers and snips
- Replace worn grips before they become slippery
Maintenance Records: Track what maintenance was done and when. This helps predict when tools will need replacement.
Conclusion: Building a Safety-First Tool Culture
The examination for the wear and tear of hand tools is not a mere exercise in compliance. It helps in saving people who use these tools daily and the business that would be seriously affected in case these tools were to be put out of action.
This course trains you to look at a range of tools from any professional capacity; carry out a visual appraisal; examine how the tool has been handled; conduct a functional test and look for ridges and burrs before recording the information. Additionally, knowledge of wear and tear markers for specific tools will help you to correctly understand what or where you will be scanning during the process for different types of tools. Finally it also provides a framework for decision making regarding repair or replacement and helps the reader know how to spend smart while protecting the interests of many, especially their own safety.
In the introduction of this handbook, the example about Marcus was given. After his circumstances changed as a result of an accident and OSHA intervention, he followed strict safety standards. In six months, his workers were able to prevent 14 power tools from failing by discarding them as they were confirmed to be unsuitable. But most important of all, there have not been any injuries on record, the prices of insurance policies have narrowed, and unlike earlier, team members have accepted the responsibility for managing safety of the tools.
Start with your toolbox today. Select one tool category and scrutinise every implement with the help of the outlined aspects. Label whatever appears defective and record your observations. Do this every time and do this together. When anyone was given a session on how to carry out an examination of tools, everyone goes home without injuries.
Ready to put this into practice? Try using a complete hand tool inspection checklist for download to commence your very first formal inspection this week. Make that the best your effort so far on your team’s safety.
Frequently Asked Questions
What are the signs of worn hand tools?
The most common signs that hand tools need replacement include:
- Cracks or fractures in metal components or wooden handles
- Mushroomed heads on chisels, punches, and struck tools (a raised lip around the edge)
- Loose components such as wobbly hammer heads or slipping plier pivots
- Worn gripping surfaces like smooth wrench jaws or rounded screwdriver tips
- Bent or deformed metal that changes the tool’s original shape
- Missing or damaged handles that reduce control or create sharp edges
- Excessive rust or corrosion that weakens structural integrity
Any tool showing these warning signs should be removed from service immediately to prevent accidents.
How often should hand tools be inspected?
Hand tools necessitate several inspection schedules:
Before every use: A 30-second glance at the hand tool that is going to be used; detect clear defects, slackened handles and any other functionality problems.
Weekly: Managers should go through all tool usage and confirm documentation is up to date.
Monthly:Record is kept of the tool usage over the month and limited inspections are done with utilization of wear indicators on the tools and repair or replacement of grossly or marginally worn tool.
Annually: Count physical stock at the beginning of the year and soldier on to analyze certain percentages of tool malfunction in different periods of the year and shop for spares for the replacements.
High-use tools or those in harsh environments may need more frequent inspections.
What does OSHA require for hand tool inspections?
OSHA mandates specific requirements under 29 CFR 1926.301 (Construction) and 29 CFR 1910.241-244 (General Industry):
- Employers must ensure all hand tools are maintained in a safe condition
- Tools with defects must be marked or tagged and removed from service immediately
- Impact tools must be kept free of mushroomed heads
- Wooden handles must be kept free of splinters or cracks
- Employers are responsible for tool safety even when workers provide their own tools
OSHA can cite serious violations up to $16,550 per violation for inadequate tool maintenance.
When should a hand tool be replaced vs repaired?
Replace immediately when you see:
- Cracks in load-bearing components
- Mushroomed heads on struck tools
- Electrical tools with damaged insulation
- Bent metal that has been straightened previously
- Damage exceeding 50% of the tool’s replacement cost
Repair is acceptable for:
- Wooden handle replacement on sound tool heads
- Sharpening of cutting edges (chisels, knives, plane blades)
- Surface rust removal and prevention
- Minor adjustments to loose pivot points
The golden rule: When in doubt, replace. The cost of a new tool is trivial compared to accident costs.
What is the proper way to inspect hand tools?
Follow this five-step inspection process:
- Visual examination: Look for cracks, chips, bends, rust, and previous repairs
- Handle assessment: Check for splinters, cracks, looseness, and grip integrity
- Functional testing: Open/close moving parts, test locks, verify smooth operation
- Edge inspection: Examine cutting edges for sharpness, chips, and wear
- Documentation: Record findings, actions taken, and next inspection date
Each step takes just seconds but catches problems before they cause injuries.
What happens if you use a damaged hand tool?
Using a damaged hand tool can result in:
- Sudden failure causing lacerations, punctures, or crushing injuries
- Slippage leading to hand injuries or strikes to nearby body parts
- Projectile hazards from mushroomed heads chipping off during use
- Electrocution from tools with damaged insulation contacting live circuits
- OSHA citations and fines up to $16,550 per violation
- Workers’ compensation claims averaging 21 days away from work
- Increased insurance premiums due to incident history
The 100,000+ annual hand tool accidents cost businesses billions in direct and indirect costs.
How do you tag out a defective tool?
Follow this defective tool procedure:
- Remove immediately from service upon discovery
- Attach a “DO NOT USE” tag with date, inspector name, and defect description
- Record the defect in your tracking system
- Store separately in a locked area or clearly marked container
- Notify supervision of the defect and affected job sites
- Destroy before disposal by cutting cords, bending handles, or cutting metal to prevent reuse
Never rely on memory or verbal notification alone. Physical tagging prevents accidental use.
Sources and References
- [OSHA Hand and Power Tools Standards](https://www. osha. gov)
- [Bureau of Labor Statistics – Workplace Injuries](https://www. bls. gov/iif/)
- [National Safety Council – Injury Facts](https://injuryfacts. nsc. org/)