How to Read a Tape Measure: Complete Tutorial
Learning how to read a tape measure is a fundamental step when starting DIY, construction or even just everyday measurement tasks. Professionals in their field or someone that would like to become more skilful at everything that involves practical work, will be helped throughout a detailed guide. The tool may seem simple but mastering it ensures a better presentation of working conditions. This article’s purpose is to present the detailed steps to follow in order to measure using the very popular tape measure. Let’s talk about applying and naming the measurements for that instrument. After you’ve read this post, you will know how to take and even know your key measurables without blowing your budget and without wasting time.
Understanding Tape Measures
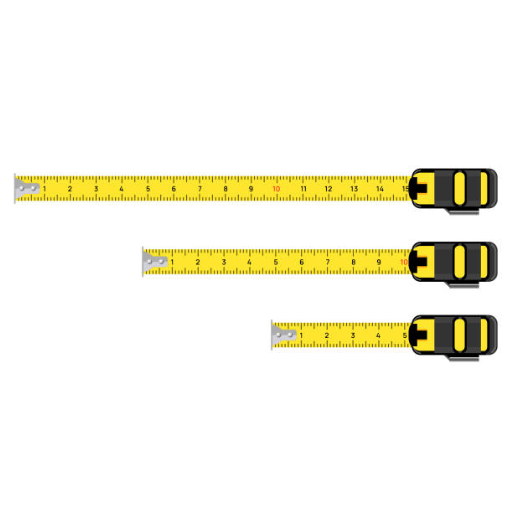
Designed with utility in mind, the tape measure is inscribed with accurate imperial (feet and inches) and metric (centimeters and millimeters) scales. The long lines with numbers are the whole inches as well on scales, while the thin ones are the lines for fractions of a unit of that scale, either a half, a quarter, an eighth, or a sixteenth. For the metric units, each line corresponds to millimeters is separated by centimeter. In some cases, additional markers such as black diamonds, red marks or colored areas are present on the tape measure for specific spacing for studs or joists during remodeling. These scales should be learned and utilized so as to put anything to measuring very near to perfection.
What is a Tape Measure?
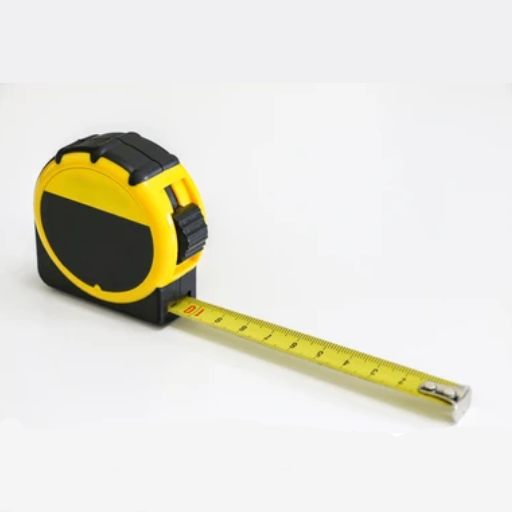
Regarding the passage as per the topic tape measure is a long strip of stainless, plastic or fabric that is marked in such a way that it can easily be used in the different applications to measure lengths to read widths even as deep as the bolt in the board nailed on the wall. It is used by all the professionals and for those who casually attends in the building, fashion, wood or mechanical courses and branches. And that is why even standard tapes are marked in both metric or imperial to fit all countries of the world and for different purposes as well. These are more refined and may have other additional mechanisms like a laser for measuring distance without a tape, b bounded by automatic tape measuring devices and some even specify in digital readings. Thanks to its small size and great adaptability, the tape measure has remained an ever-present tool in performing different kind of tasks with great precision and obtaining trustworthy results.
Types of Tape Measures
| Type of Tape Measure | Key Feature | Ideal Use |
|---|---|---|
| Locking Tape Measure | Auto-lock mechanism for stability | Construction and renovation projects |
| Steel Tape Measure | Durable steel blade, high tensile strength | Heavy-duty industrial applications |
| Fiberglass Tape Measure | Lightweight and non-conductive material | Electrical and outdoor tasks |
| Digital Tape Measure | Includes digital display for accuracy | Precision-required projects |
| Laser Tape Measure | Uses laser for distance measurement | Long-range measurements |
| Pocket Tape Measure | Compact and portable design | Everyday household use |
| Surveyor’s Tape measure | Extra-long length for surveying works | Land surveying and large areas |
| Magnetic Tape Measure | Magnetic tip for holding to metal surfaces | Tasks involving metal measuring points |
| Dual-Scale Tape Measure | Includes both metric and imperial units | International and diverse standards tasks |
| Retractable Tape Measure | Spring-recoil mechanism for convenience | Quick measurements with easy storage |
Common Uses for Measuring Tape
- Construction and Carpentry
Almost every step involved in construction, and crafting utilizes tape measures, particularly in offering precise measurements of wood, wall partitions, building materials among others. Professionals oftentimes use tape measures with dual-scale or retractable tape measures to record the exact dimensions relatively quickly in their project plans. - Interior Design and Home Improvement
These jobs demand such things as exact preparation of the room for further furnishing, deciding on the window furnishing, and designing the room out specifically. For this purpose, a flexible or extending ruler is employed nearly always, so that necessary adjustments and the required distance (spacings) between items are guaranteed, no gaps are left. - Sewing and Tailoring
When it comes to taking measurements of fabrics and body dimensions, a soft tape measure or body measuring tape is indispensable in sewing and tailoring. This is to make sure that these measurements will be exact for the placing of sewing machines and cutting of materials in advance. - Land Surveying
Land is measured using a special tape measure, such as a surveyor’s tape measure, to cover long distances. The distances covered by these long equipment form an integral aspect of geospatial analysis and determination of property boundaries alongside other activities. - Metalworking
Magnetic tape measures are also useful in the area of metal fabrication where they can be attached to metal surfaces without falling off whenever they are not held; this is helpful as the operator can employ both hands without losing control over the measuring tool while cutting or welding. - DIY and Crafting
Hobbyists and DIY enthusiasts use tape measures for crafting, woodworking, and model building so that their projects come out nice and neat in every possible way. In such cases, also dual-scale and retractable tape measures are simply very good.
Basics of Reading a Tape Measure
- Identify the Markings
A tape measure normally has marks at certain intervals representing units those are typically inches or fraction of an inch. On many tape measures, the large numbers represent inches where the smaller lines within are inch divisions (e.g., 1/2, 1/4, 1/8). Some also have measures in metric system for added functionality. - Position the Tape
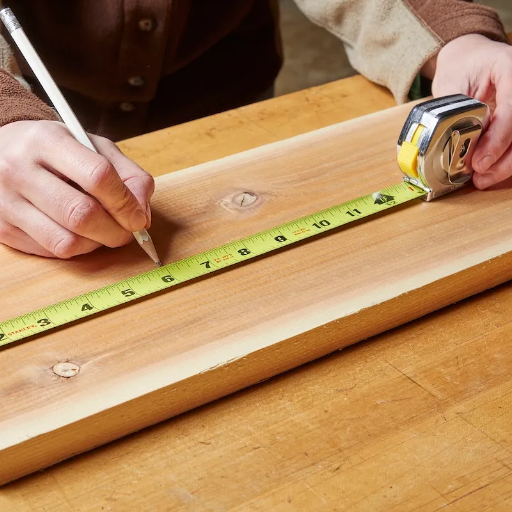
Reeling out the tape measure from its casing to the desired length, bring its metal end to the side where you need to start a measurement without distorting the tape’s natural shape. It should form a straight guideline so as to provide you with accurate measurements and avoid making mistakes. - Read the Measurement
Locate the adjacent number to the place of your measurement. When it comes to the fractal parts, check the stripes and observe what the smallest partition is supposed to be if an accurate measurement is to be effected. - Account for the Hook
A sliding metal hook is usually added to most tape measures to adjust for the width of the hook. This ensures the measures are exact whether you are measuring the inner or outer parts of something.
Inches and Fractions Explained
A kind of distance in the ancient number system called imperial measurement one of the most popular and commonly used. Precision is very important for an inch as it can encompass several measured parts of the system. The shortest measuring distance in the division of an inch consists of 16 parts which are sometimes called sixteenth of an inch. From these divisions, further subdivisions can be obtained – the half, the quarter, the eighth, and the sixteenth parts.
Such ability is very useful and it is possible to measure even the smallest of the markings for example in a ruler, with most of them being even and uneven numbers. For example, thus, the flat surface of the ruler has the lines that are parallel to the edges and therefore once marked with the whole number of an inch, the two lines are numbered 1/2 inch, the next half has two lines that are marked with the full range of markings showing the center in 1/2 inch and, then, as before, the 1/4, 3/4 lines, are longer and the 1/8, 3/8, 5/8 and 7/8 positions have much smaller lines, each less than a quarter of an inch.
In order to interpret these fractional measurements correctly, one first needs to grasp how they are ranked inside the inch. For example, in woodworking, metalwork or any other kind of work where measurements need to be precise, the differentiation of fractions comes into play. It is also important to create a system for the ease of working that has calibrations or marking at even intervals and inproportion by which users can read them and other users can expect equal or identical readings. This concept, together with the detailed picturization of each component, is very conspicuously seen in the use of scientific notation (or the scaling).
Reading the Scale: Whole Inches vs. Fractions
One of the most important things to remember while measuring is the significance of knowing how to measure the distance between two whole inches and fractions to the extent possible. The reason why even standard rulers or tapes are intended to be broken with whole inches and fractions, for instance, can be explained properly. The higher peaks of graded long marks are sewn equally to whole inches, and they are usually marked more clearly and simply, while the fractals are represented in detail by lower short-dashed markers, for example, the half and the quarter, the eighths, and the sixteenths.
Consequently, these ratios take on the shape of an exponential law two to the power of n that can permit the separation of every interval in such a manner that it may be generalized or detailed whenever demanded. These are the so called geometric symmetry others basic sequence will be 1 as shown. The components of the circle are precisely the parts of circle and can be easily subdivided into simpler parts. Hence, fraction measurements done this way enables one to obtain measurements with quite a small gradation but one that consists no uncertainty whatsoever. For instance, specific calibration or slide rules are very helpful in measuring those fractions and applying their equations to increase or decrease an area.
Understanding the Markings
Fine tools, like a ruler, vernier caliper, and a micrometer, are structured with the markings that are well-modified to play a vital role which is measuring. The lines in these tools require the user to have a particular methodology in narrow steps. A typical ruler, for example, may be divided with visible lines into major units such as inches or centimeters. Usually, these major units are further divided into smaller fractional or decimal units. The lowest mark for division in an inch on an imperial ruler is equal to units like 1/16 or 1/32 inch, which allows such tools to measure even intricate lengths.
Technical instruments designed to fractionally measure the distance, thickness, and diameter of objects often contain extremely fine divisions, such as to the thousandth of an inch or less. The commonly used mechanism is to provide these divisions in a rotatable axis with supplementary ones on a surrounding casing or thimble to arrange the most exact readings. In addition to these explanations, clear spacing, labeling, and other aids to the measurement can reduce the complications. Because the use of sight can provide errors, the effect is compensated through design (or arrangement) so that the instruments provide consistent accuracy irrespective of whether they are employed on the shop floor or in a science lab.
Step-by-Step Guide to Measure with a Tape Measure
- Prepare the Surface or Object
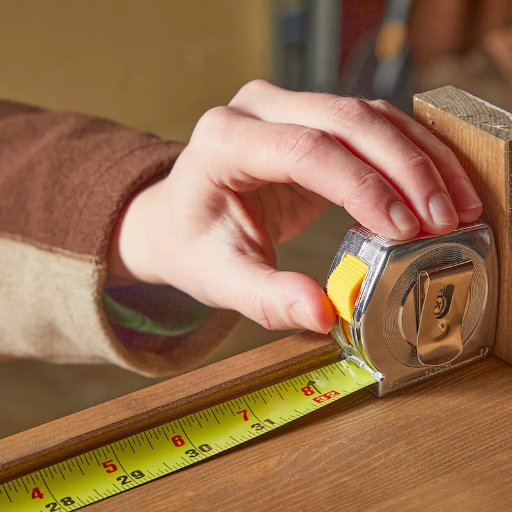
Check that the surface or object you are measuring has no dirt or is not blocked by any objects. This is doubly important to get results that are precise, stable, and can be repeated whenever needed. - Secure the Tape Measure
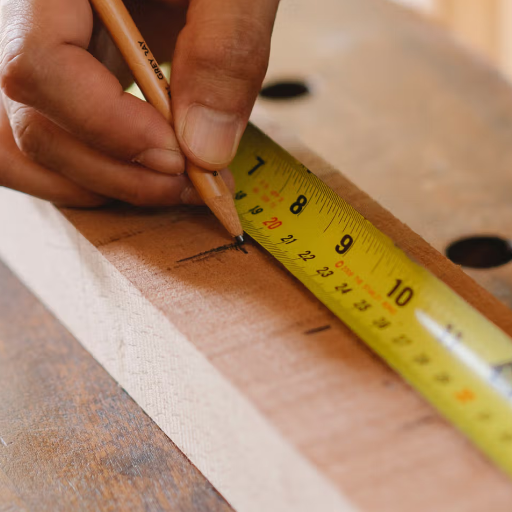
Attach the tape measure (blade) to the starting location of the object or surface and secure it with the hook at the edge. If no such start marking is present, maintain one hand to hold the edge of the tape in place while the other hand sees the tape to draw lines. - Extend the Tape
Carefully take the measuring tape along the line of measurement. While unravelling, please ensure that only the reeling end of the tape is free and the rest is still wrapped on the reel. - Read the Measurement
Look directly at the endpoint of the tape measure, and more specifically at the graduation marks on the tape. Notice in particular that the reading is right below the closest mark. Almost all tape measures are in inches and centimeters which is important as it offers less restrained use of the tape measure. - Record the Measurement
Take down the results quickly, with the appropriate unit of measure (for instance 12 inches is equal to 30 centimeters) so that there are no mistakes later on. - Retract the Tape
Activate the stopper or else hold down the tape gently to make it rewind. Halt the tape and do not let it recoil immediately, as it can cause the retractor to wear at a fast rate.
Preparing to Measure
Before executing any measurements, it is vital to get ready by arranging tools, environment and executing calibration checks to attain proper measures. This will involve selecting one that is neither too expensive nor the cheapest of tapes. It is also needed that the tape does not have any damage since it will lead to bias areas when taking the measurements. It will also be necessary to make sure that the surface or object that needs to be taped off is free of any foreign objects since such objects can lead to variations in the alignment of the components.
For most accurate results, lighting levels should be kept maintained uniformly to ensure that the tape markings are easily visible. Also, it is important to adjust one’s standing height to be in line with the tape so that the result can be taken accurately without the interference of non-existent constraints. You should always remember that the correct approach will help collect data that will eventually be accurate and most suitable for a lot of needs.
How to Hold a Tape Measure
It is of utmost importance to have the correct way of holding a measuring tape to avoid mistakes as well as obtain accurate readings. First, firmly hold the casing and make it steady with the hand that you use to write. Make sure the tape is not pulled back into the in case you want to stick to the same length of the tape. For longer sections, use the attached bolt on the other side of the tape measure hook and adjust it properly to ensure that it sits in a straight line and that there is no sag or fold. The tape must be viewed along the length with the aid of the ruler and it must also be ensured that the marking lines on the tape measure are within the user’s field in order to avoid reading errors sometimes caused by bending of the measuring tape.
Also, in most accurate job types, when it comes to work like construction or design, pick a tape measure that has subdivisions that can be utilized to the desired tolerances to the nearest fraction of an inch or in terms of centimeters. Make sure to check the tape and measure if the hook is worn or becomes loose on an often … task or system, since even slight inconsistencies mess up differences in measurements and operations that the tool is meant to be used for. If you stick to these tactics, you will be able to sustain the uniformity and dependability of any measuring procedure.
Taking Accurate Measurements
Attaining an appropriately accurate estimation of dimensions is dependent on several factors, predominately the foremost of which include the calibration of the device used, the ambient conditions or the skill of the operator. Calibration is particularly crucial in ascertaining that a measuring instrument works within a specified standard. Devices such as calipers or micrometers need to be calibrated more than once every time because of wear and use of the instruments accuracy declines. The exposure of the materials to extreme conditions such as changes in temperature and humidity also plays an important role of the dimensional accuracy. The relevant affairs are not measured without error; the expectation thus remains to control unnecessary variation owing to measurement.
One of the important elements of the technique is the User trait that is aspect of professionalism when working with professional tools. Actually sticking to the angles, aligning the key, and viewing the gauge in the same position are important for accuracy when performing workmanship. In addition to this, it is very important to use the right instrument of measurement for the job – for example, where there are such tools as laser distance meters ideal for measurement of large distances, although the exact or equally versatile vernier calipers can be used in the measurement of very small dimensions. Comprehending these factors, combining the point to point protocols can be described as the rationale for continuing sound measurement procedures.
Practical Tips for Using a Tape Measure
- Ensure Proper Placement: Press the hook of the tape measure firmly across the boundary of the object to lock it and for you to take measurements in the perfect or real straight line.
- Maintain Tension: At the time of measurement also do not forget to keep the tape well stretched to prevent it from distorting the results as the sagging or bending effect will occur in the tape; the results will be distroted then.
- Use the Correct Units: Make sure to know what system is used namely, inches or centimeters for this task and verify the correctness of this settings by checking marks on the measuring tape.
- Read at Eye Level: See to it that the tape is positioned at the level of your eye, to eliminate either high or low errors in taking measurements.
- Check for Wear and Damage: Every now and again, it is essential to look at the tape itself and check if it is straight, twisted or the hook how it should be in order for the device to be equally in good calibrated condition for future use.
Common Mistakes to Avoid
- Relying on a Damaged Tape Measure: Using a worn or damaged clip can result to a person taking the wrong measurement. Use and wear of the tapes, especially those with deformed hook, inscriptions running away and tapes going to snips mainly at the edges should be corrected before use.
- Incorrect Starting Point: The beginning of a measuring tape should be aligned accurately such that it touches the edge of the item otherwise a lot of error will be introduced in the calculation. Avoid miscalculations by always ensuring the reference such as the measured length is correctly positioned to commence the measurement.
- Neglecting Environmental Factors: Problems like temperature change, variant orientations of surfaces and so forth can make it difficult to obtain precise measurements. For instance, high temperatures cause some types of materials to expand leading to poor readings. Try to carry out measurements in existing conditions when such is the case.
- Misreading the Scale: One of the most common mistakes is mistaking the scale, which occurs when individuals face the challenge of understanding the differences between both the metric and imperial systems of measure. Determine what the measurements of your project are and tape measure its scale in order to assess its suitability.
- Skipping Calibration Checks: It is not uncommon for tools that are supposed to be precise to lose this trait owing to use over time. You must carry out regular calibration checks against an established standard to guarantee that your measurements will be accurate.
- Improper Tape Tension: Using incorrect measurements can change the validity of the results especially if the measuring tapes are pulled too hard or used without any form of tension at all, and this is not the desired outcome. Leakage information sources.
Techniques for Measuring Curved Surfaces
Tape tension is not inappropriate when addressing irregular surfaces. Still, more effort and enhanced safety measures are critical in the process of taking measurements of curvilinear surfaces, particularly for surfaces with intricate shapes and sizes, where the use of metal tapes and metal rulers may prove unsuitable. This is where soft and flexible measuring tape is. The tape should be placed very tightly with the surface with no air space or heavy strain to protect the assigned parameters.
In situations where accurate measurements are even more critical, for example working with engineering or in production, it is recommended to use the profile gauge or contour gauge. These devices aid in recording a proper representation of a curve thus allowing for precise measurements to be taken. It is after application of these principles, that calipers that are digital and would have attachment accessories that are capable of measuring curved surfaces are an option that is further advanced pr let us say highly accurate.
Furthermore, finding the starting and ending points of affects in a curved space makes it easier to keep a coherent set of all turns. Most commonly, in an irregular curved object or a geometrically complex artifact, there is increasing application of 3D laser scanning and photogrammetric technology. Such devices and systems allow for the modeling of a more detailed and scaled version of the curved surface with the single goal of spatial evaluations and measurements in respect to forms.
How to Measure Angles and Distances
In measuring angles and distances accurately, the use of both traditional and advanced systems is proving to be very useful in several areas. Devices for measuring angles include the use of devices such as digital protractors, theodolites, and inclined measurement devices. These tools work by incorporating sensors that make it possible to measure the angles of turns with incredible accuracy without any chances of errors, giving tools that are very effective for the measurement of bends in civil works, construction works, and survey.
In the case of laser measuring models, which are now all the vogue, and also the electronic distance measurement (EDM) instruments, it is all in devices’ capability of delivering exact distances, even over relatively long distances. This equipment works by application of lasers and electronic pulses to get the real separation between two position points with precision up to 1mm. Should one need to elaborate further on spatial data, not merely angular measurements or length measurement ought to be fully integrated in the model, so workers can also work out coordinate based models with arrow marks that are determined to the last minute. Thus, this directed graph approach is found to be adequate for the case of extremely precise and inefficient measurement conditions.
Advanced Techniques for Accurate Measurement
Two of the best instruments for obtaining accurate measurements in today’s practice are the laser rangefinders and total stations, as far as more advanced tools are concerned. Basically, laser rangefinders are devices that send a laser pulse to the target and measure the time for it to return, enabling very long range as well as very high precision distance measurements. The purpose of total stations is quite similar however the introduction of electronic distance measurement (EDM) alongside its angular measurement capabilities provide outstanding accuracy in both distance and angles determinations. All these equipment finds wide application in industries which demands absolute precision, for example, construction, surveying, and engineering. However, to produce this result, one has to set up all these instruments properly.
Using Tape Measures for DIY Projects
Tape measures are one of the widely used tools across a number of different do-it-yourself activities. They provide an easy and accurate way to measure the length. Modern advanced tape measures have features like the tape stabs needed for securing the measure in place, ergonomic with comfort grips, dividers with scales on both imperial and metric units. This guarantees short possibilities of errors and hence more success when doing different tasks. For correct measurements of panels, a tape measure is needed seeing that is used in woodworking for getting angles and for cutting.
For fitted shelves to be installed to a high standard or the available fittings to be installed effectively and without any difficulty there is a need to take accurate measurements. Advanced tape measures now use laser measurement to a significant extent with a capability for accuracy in large scales or in areas of certain naturally irregular shapes. The proper use of a tape measure during any work requires one to include the basic steps like controlling the tape end and holding the tape firmly to the surface.
How to Read a Tape Measure and Figure Fractions
There are a lot of people who know how to read a tape correctly since the tape measure needs to be read according to the lines on its body to be able to give out the right measurements. The tape measure is widespread and commonly available, indicating the increments at different points in either imperial units or terms of measurement in addition to their international counterpart with the contiguous markings in these forms. Generally speaking, between inches, on either side of a wide, fractional line, there are aesthetically divided smaller lines with slices such as 1/2, 1/4, 1/8, and 1/16 of an inch as required. The way these intricacies come to be matters greatly since it will help in prevention of errors while solving difficult technical problems.
First, you should locate the largest lines that mark the entire inches. The smaller ones in the middle denote the end, and these can be small according to the fractional parts being represented. For example, the second or medium sized lines represent the increments that are half an inch, some are even 1/4 and 1/8, or 1/16 and so on. Calculating lower or higher fractions within one inch involves counting such differences.
To make calculating with fractions and numbers more efficient, it is better if you know the decimal values of the fractions, for example, 1/4 = 0.25 and 3/8 = 0.375, because then you will be able to use different measures without any difficulty. Along with them, some premium tape measures possess fraction help markings and even show measurements in a digital manner to facilitate use and minimize error. When people recognize such skills, they are assured with the highest exactitude of the dimensions by influencing precise objective mobilization and result achievement.
Reference Sources
- Fractions and Decimals on an Inch Tape Measure
Link to source - Measuring Lengths and Distances
Link to source
Frequently Asked Questions (FAQs)
How to read a tape measure complete tutorial?
Breaking-down of tasks that need to be completed, in a card that will include blade cuts, simple whole inches and values, half, quarter, eighth, and sixteenth values, among other issues. In the first place, add the hook to the material edge and take a very close whole inch measurement, and look for the graduation division number on the scale. Take other dimensions outside the tested space and even further if necessary distance is to be measured without help by leveraging the drop functionality.
How do I read fractions on a tape measure?
Indicators of fractions on a tape measure are concentrated in an inch where the highest lines are clearly. Thereafter, in order of sizes are halves, quarters, eighths, and sixteenths, where each graduation will have a greater number of subdivisions. On figuring out how to read, one begins from the last whole inch and moves forward counting the marked graduations. The total is then expressed in fraction form, simplified if necessary or changed into a decimal for more precision. The easy manipulation of fractions in the form of decimals helps with layout and minimizes errors while measuring and marking-up constructions.
How do I measure accurately using the tape measure hook?
The hook of this measuring tape adjusts for the thickness of the hook itself. For measuring the external dimension, hook the tape into the edge and the metal hook will push towards the edge. When measuring the internal size, push the tape with the hook towards the inside of the measurement. Ensure that the hook does not wobble and it gives a little leeway because of the thickness of the tang otherwise it will be inaccurate. Also, use the blade to inspect for dirt, the presence of nicks and scratches as a result of measurements.
How do I switch between imperial and metric on a tape measure?
In most cases, the rule is marked in inches and fractions, and much other additional information is large scrolled in centimeters and millimeters on the other side of the rule. Use the scale which matches your project dimensions when measuring. Just remember that there are 25.4 millimeters in an inch, and round off fractions to obtain the corresponding decimals which help to speed up metric conversions. Use the measurements in millimeters on the scale when working on metric plans.