
How To Sharpen A Hand Saw: Step-By-Step Guide (2026)
Yes, you can sharpen most hand saws yourself with a triangular file and a saw set tool, and the full process takes under an hour once you know the steps. This guide walks through every step of hand saw sharpening, from checking your steel to storing a razor-edge blade, so you can skip the cost of replacement and keep cutting clean.
Most woodworkers sharpen a saw long before the edge is truly gone. The problem is they don’t know what a sharp edge feels like, or when the blade has quietly crossed the line from “fine” to “fighting you.” Here’s the good news: hand saw sharpening is one of the most forgiving maintenance skills in the workshop. The technique is simple, the tools are cheap, and a mistake rarely ruins the saw. What it does require is a clear process and the right file for your teeth. If you’re still choosing a saw, our best hand saw buying guide covers selection, and our how to use a hand saw guide covers the technique this sharpening routine supports.
In this guide you’ll learn the signs of a dull blade, how to tell whether your saw can even be sharpened, the exact tools and file sizes you need, the seven-step sharpening method, the filing angles that separate rip saws from crosscut saws, how to handle a Japanese pull saw, and how to store a sharp blade so it stays sharp.
Key Takeaways
- Most hand saws are resharpenable with a triangular file and a saw set, but impulse-hardened teeth (often bluish) can’t be filed and must be replaced.
- Match your file to your teeth per inch: 6″–7″ file for 4–7 TPI, 5″–6″ for 8–10 TPI, 4″–5″ for 11–14 TPI.
- File rip saws square to the blade at roughly 90°; file crosscut saws at a 60–80° angle with 15–25° of fleam.
- The seven-step sequence is clean, clamp, joint, set, file, deburr, test.
- With proper storage (light oil, dry place), a sharpened blade can outlast several cheap replacements.
Signs Your Hand Saw Needs Sharpening
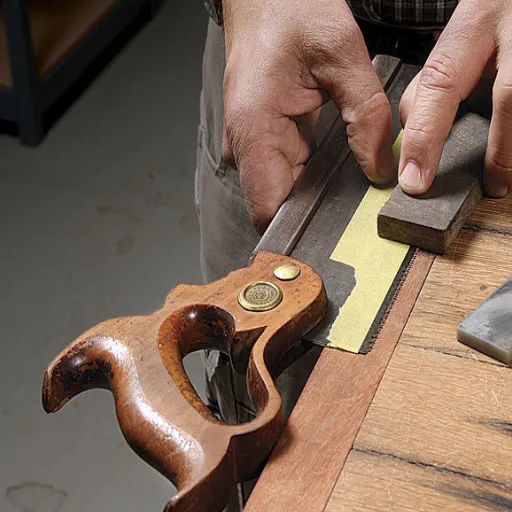
Dull saws don’t announce themselves politely. They sneak up over weeks of use until cutting a simple board becomes a workout. Learn these signs and you’ll know exactly when to reach for the file.
- More force than usual. If you’re pushing harder and the saw still feels sluggish, the teeth have lost their bite.
- The cut wanders off line. Uneven or worn teeth pull the blade sideways, and no amount of guiding fixes it.
- Rough, splintered edges. A sharp saw slices fibers; a dull saw tears them, leaving tear-out and fuzzy edges.
- Burn marks on the wood. Friction from a dull edge heats the wood and darkens it along the cut.
- Sawdust looks like powder. Sharp teeth throw coarse chips. Fine dust means the teeth are scraping instead of cutting.
- Screeching or vibration. A smooth-cutting saw runs quietly. Noise is a reliable distress signal.
- Chipped, bent, or missing teeth. Inspect the line of teeth; any damage needs correction before cutting again.
- Rust or sticky resin. Surface rust blunts edges, and gummed-up resin can make a sharp saw feel dull. Try cleaning first.
Keep this list handy. If you notice even two or three of these, the blade is ready for hand saw sharpening. A good test: run your thumb lightly across the tooth tips. Sharp teeth feel grabby, like a cat’s claws. Dull ones feel smooth, like a cat’s tongue.
Can You Sharpen a Hand Saw? First, Check the Steel
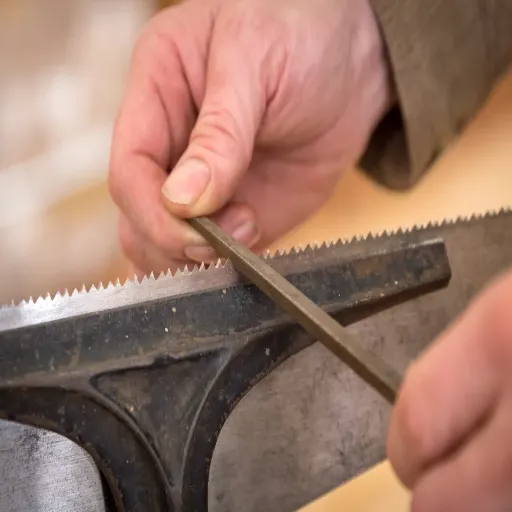
Before you buy a file, you need to know whether your saw is worth sharpening at all. This is the single most common mistake in hand saw sharpening: trying to file teeth that were never meant to be filed.
The short answer is that saws fall into two groups.
Resharpenable saws. Traditional hand saws made from a single piece of high-carbon steel have teeth ground into the plate itself. The whole blade is the same metal, so a file can restore the edge. These are the saws that sharpening guides are written for, and they reward the effort for years.
Impulse-hardened saws. Many modern saws, including most Japanese pull saws and many economy Western saws, have teeth hardened separately. The result is a tooth surface harder than your file. When you run a file across it, the file skids and scrubs instead of cutting. These teeth are often darker, with a bluish or black tint, and they are effectively disposable.
The quick test is simple. Run the edge of a good file across one tooth. If it bites and cuts a bright spot, the saw can be sharpened. If it skids or makes a screech, the tooth is hardened, and you should plan to replace the blade instead.
If you’re unsure whether a saw is worth the effort, check what it cost. A cheap, thin-plated saw is rarely worth an hour of filing. A quality high-carbon saw, or one with sentimental value, is almost always worth restoring.
Tools You Need to Sharpen a Hand Saw
Hand saw sharpening requires a small, affordable toolkit. You likely own part of it already. Here’s everything you need, with a rough idea of cost.
| Tool | Purpose | Typical cost |
|---|---|---|
| Saw vise (or bench vise + wood jaws) | Holds the blade rigid with teeth pointing up | $20–$60 |
| Triangular (taper) file | Cuts the tooth faces to restore the edge | $8–$15 |
| Saw set tool | Bends teeth alternately so the kerf clears the blade | $15–$30 |
| Jointer / flat mill file | Levels uneven tooth tips before filing | $10–$15 |
| Sharpening stone (diamond or oil) | Removes the burr left by filing | $15–$40 |
| Wire brush + mineral spirits | Cleans rust and resin from the plate | $10–$20 |
| Cut-resistant gloves, safety glasses | Protects hands and eyes during filing | $10–$20 |
If you don’t own a saw vise, clamp the blade between two strips of scrap wood in a bench vise, with the teeth poking just above the jaws. This works almost as well and costs nothing. The important part is that the blade doesn’t move or vibrate while you file.
How to Sharpen a Hand Saw: Step-by-Step
Here’s the core method. Work through these seven steps in order and you’ll have a sharp, correctly set saw.
Step 1: Clean the blade
Remove rust with a wire brush, working away from your body. For stubborn rust, use steel wool or silicon-carbide sandpaper with mineral spirits, then wipe the blade dry. If the teeth are gummed with resin, a soak in mineral spirits dissolves it. A clean blade is not just nicer to work on; rust and grit will round your file before you feel it.
Step 2: Clamp the saw in a saw vise
Mount the saw with the teeth pointing up and just above the vise jaws. The blade must be completely immobile. Filing a loose blade is dangerous and ruins the edge. If you’re using wood jaws, tighten until the blade can’t shift, but don’t crush the plate.
Step 3: Joint the teeth
Hold a flat mill file level and run it once or twice across the tops of the teeth, from heel to toe. This creates a tiny shiny flat on each tip and ensures every tooth is the same height. Joint only until the lowest tooth shows a flat; over-jointing shortens the teeth. Two or three passes is plenty for a lightly worn saw.
Step 4: Set the teeth
Use a saw set tool to bend the top one-third of each tooth alternately, one to the left and the next to the right. Set amount is about one-third of the blade thickness total, roughly one-quarter per side. This makes the kerf wider than the plate so the saw doesn’t bind. Use less set for hardwood and more for softwood, and test before adding more.
Step 5: File the teeth
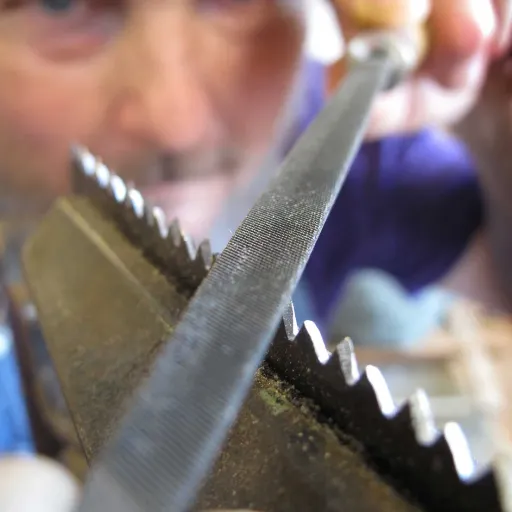
Choose the correct triangular file for your TPI (see the table below), then file every other tooth along one side. Use firm pressure on the forward stroke and lift the file on the return. Give each tooth the same number of strokes, typically two or three, so the teeth stay uniform. Then flip the saw and file the remaining teeth from the other side. You’ll know a tooth is done when you see a bright, clean bevel on the cutting edge.
Step 6: Deburr the teeth
Run a fine diamond or oil stone lightly across both sides of the teeth. This removes the burr left by the file. Skip this and the burr will roll over on the first cut, dulling the saw almost immediately.
Step 7: Test the cut
Make a test cut in scrap wood. If the saw cuts straight and clean, you’re done. If it binds, the set is too heavy or uneven, and you should check your set tool setting. If it veers, look for a tooth or two that were over-filed and correct them.
Saw File Sizes and Filing Angles That Matter
Two details decide whether your sharpened saw actually cuts: the size of the file and the angle you hold it at. Both depend on the saw’s tooth pattern, which is measured in teeth per inch (TPI).
File size by TPI
| Saw teeth (TPI) | File type | File length |
|---|---|---|
| 4–7 TPI (coarse rip) | Regular taper | 6″ or 7″ |
| 8–10 TPI (general crosscut) | Slim taper | 5″ or 6″ |
| 11–14 TPI (fine dovetail/tenon) | Extra-slim taper | 4″ or 5″ |
| 15+ TPI (very fine) | Double extra-slim | best left to a pro |
The file should sit in the gullet with roughly half its edge submerged. A file that is too wide cuts the gullet too deep and weakens the teeth. A file that is too narrow can’t reach the bottom of the gullet and leaves a rounded, useless corner.
Rip saw vs. crosscut saw filing angles
Rip saws cut with the grain, so their teeth work like tiny chisels. Crosscut saws cut across the grain, so their teeth work like tiny knives. The filing angles reflect that difference.
| Saw type | File angle to blade | Rake/fleam | Edge shape |
|---|---|---|---|
| Rip saw | Square, ~90° | Rake 0–10° | Chisel edge |
| Crosscut saw | ~60–80° | Fleam 15–25° | Knife edge |
Hold the file horizontally and keep the strokes perpendicular to the blade for a rip saw. For a crosscut saw, angle the file to add fleam, the bevel that makes the tooth slice across fibers. A simple way to keep angles consistent is a wooden file guide or a commercial sharpening guide clamped over the teeth. Consistency matters far more than hitting an exact number. For a deeper technical breakdown of rip and crosscut tooth geometry, Nick Engler’s sharpening hand saws reference is a strong authority.
Sharpening a Japanese Pull Saw
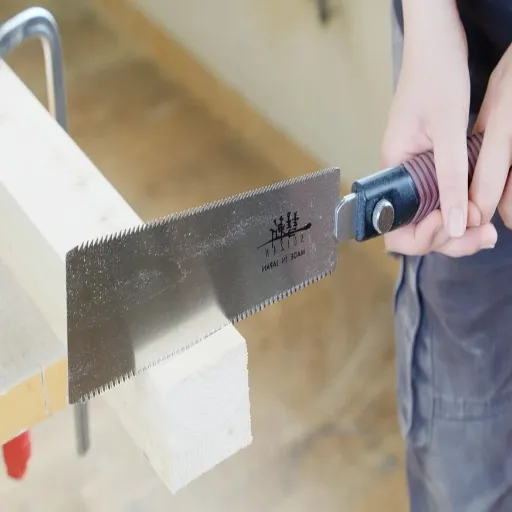
Japanese pull saws deserve a special note, because the common advice to “just sharpen it” doesn’t apply to most of them.
Most Japanese saws, including dozuki and ryoba models, have impulse-hardened teeth that are harder than any file you own. They often show a bluish tint on the tooth line. You can’t resharpen these by hand; you replace the blade, and many Japanese saws are designed for exactly that with replaceable blades. Wood Magazine answers the common question of whether a Japanese pull saw can be sharpened, and our Japanese pull saw guide covers construction and buying details.
A small minority of Japanese saws are made without hardened teeth specifically so they can be resharpened. For those, you use a feather file rather than a taper file, with a No. 3 (75 mm) size for dozuki saws and a No. 4 (100 mm) for ryoba saws. The technique follows the same alternating pattern: sharpen every other tooth from one side, then flip and do the rest, pushing the file across each tooth three or four times. Finish with tiny secondary bevels on the tooth tips to keep them from snapping off.
If you own a typical modern pull saw, save yourself the frustration and buy a replacement blade. If you’re shopping for a saw you intend to keep for life, look for a non-hardened model that can be sharpened, or budget for replacement blades from the start. Our guide to the different types of hand saws explains where pull saws fit in the wider family.
Hand Saw Maintenance: Storage and Rust Prevention
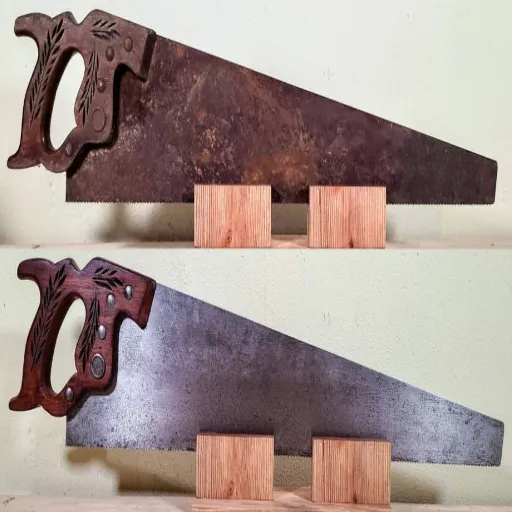
A sharpened saw stays sharp only if you protect it. Maintenance is the quiet half of hand saw sharpening, and it takes about two minutes per saw.
- Wipe the blade clean after every use, removing sap and resin before they set.
- Apply a light oil, such as camellia oil or machine oil, or a thin coat of paste wax to the plate.
- Store the saw in a dry place. A saw till, a hanging rack, or a blade sleeve all work.
- Keep the teeth away from other tools so they don’t get dinged.
- Before long storage, re-check the set and add a touch more protection.
For a professional shop, build this into a routine. Assign one person to inspect blades at the start of each week, rotate stock so blades are not overworked, and log any saw that goes out for sharpening. A simple checklist keeps a fleet of hand saws cutting clean and catches damage before it costs you a job.
Sharpen vs. Replace: When Is It Worth It?
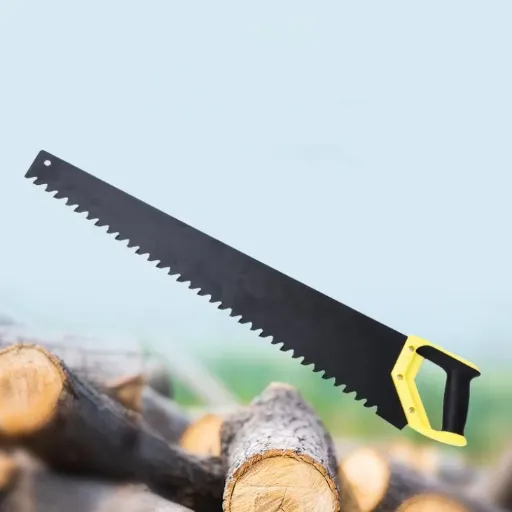
Every saw owner eventually faces this question. The honest answer depends on the saw.
- Resharpenable high-carbon saw: Sharpen it. A file and a saw set cost roughly $15 to $30, and a good saw can be sharpened dozens of times.
- Impulse-hardened saw: Replace it. The blade can’t be filed, and replacement is usually cheaper and faster than a professional re-grind.
- Very cheap saw with a thin plate: Replace it. There isn’t enough steel to work with, and the labor is worth more than the tool.
- Badly rusted, bent, or over-filed saw: Consider replacement, or a professional sharpening service if the saw is valuable.
The economics favor sharpening for anyone who works wood regularly. For distributors and brands selling hand saws, the sharpen-vs-replace decision is also an inventory decision. Offer customers a clear choice: resharpenable blades for users who maintain tools, and replaceable blades for users who want zero maintenance. Understanding this split helps you spec a product line that fits both buyers. If you’re sourcing saws or blades in volume, our guide to working with a hand saw manufacturer and our wholesale hand saws overview are good places to start.
6 Common Hand Saw Sharpening Mistakes
Sharpening is forgiving, but these mistakes cause most failures. Avoid them and you’ll be ahead of most DIY sharpeners.
- Using the wrong file size. A file that is too wide weakens teeth; one that is too narrow rounds the gullets. Match the file to your TPI.
- Inconsistent stroke counts. Giving one tooth five strokes and its neighbor two makes the edge uneven. Count your strokes.
- Skipping the set. Filing without setting leaves a kerf narrower than the plate, and the saw binds in the cut.
- Over-setting the teeth. Too much bend weakens the teeth and makes a rough, oversized kerf. Start light and test.
- Filing hardened teeth. This ruins a good file in minutes. Run the skid test before you begin.
- Skipping the deburr. A fresh burr rolls over on the first cut and undoes your work. Stone both sides every time.
Hand Saw Sharpening: FAQs
Can you sharpen a hand saw?
Yes, most traditional hand saws can be sharpened with a triangular file and a saw set. Impulse-hardened saws, including most Japanese pull saws, can’t be filed and need a replacement blade.
How do I know if my hand saw is dull?
The clearest signs are extra force, a wandering cut, rough edges, burn marks, and sawdust that looks like powder instead of chips. A dull blade also feels smooth at the tooth tips, while a sharp one feels grabby.
What file do I use to sharpen a hand saw?
Use a triangular taper file matched to your teeth per inch. Coarse saws (4–7 TPI) take a 6″ or 7″ file; fine saws (11–14 TPI) take a 4″ or 5″ extra-slim file.
What angle do you file a rip saw vs. a crosscut saw?
File a rip saw square to the blade at about 90 degrees. File a crosscut saw at a 60 to 80 degree angle with 15 to 25 degrees of fleam so it slices across the grain.
Can you sharpen a Japanese pull saw?
Most Japanese pull saws have impulse-hardened teeth and can’t be resharpened. A few non-hardened models can be sharpened with feather files, but replacement is usually the practical choice.
How often should I sharpen a hand saw?
It depends on use. Heavy daily users may sharpen every few weeks. A hobbyist might sharpen once or twice a year. Watch for the dullness signs and sharpen when they appear.
Is it cheaper to sharpen or replace a hand saw?
For a resharpenable high-carbon saw, sharpening is cheaper. A file and saw set cost about $15 to $30 and can service the same saw for years. For impulse-hardened or very cheap saws, replacement wins.
Conclusion
Hand saw sharpening is a skill every woodworker and shop owner can learn in an afternoon. The whole method comes down to seven steps: clean, clamp, joint, set, file, deburr, test. Check your steel first, match the file to your TPI, hold the right angle for your saw type, and protect the edge with proper storage. Do that and a quality saw will cut cleanly for years instead of being thrown away at the first sign of dullness.
When you buy a saw that is worth keeping, sharpening becomes part of its cost of ownership, and it’s a small one. That’s the thinking that guides our own product range: durable, resharpenable blades for professionals who maintain their tools, and honest guidance on when replacement is the smarter call.
If you’re sourcing hand saws or replacement blades for a workshop, a product line, or a distribution network, talk to our team. We supply professional hand tools factory-direct with strict quality control, and we can help you choose a range that fits how your customers actually work.
Ready to build your hand saw product line? Request a quote →