

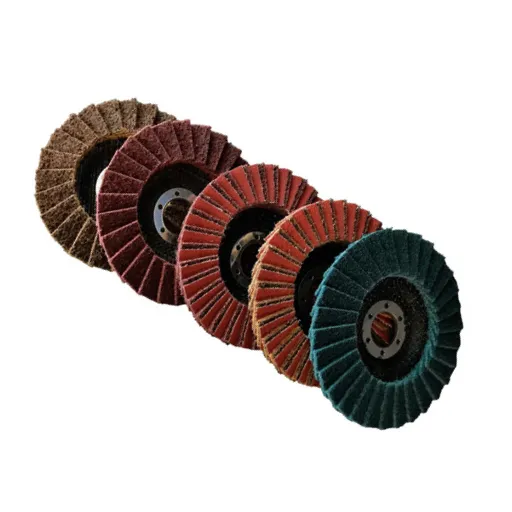
Flap Disc Grit Selection: Match Removal and Finish
Start flap disc grit selection with the material you must remove, the metal you must preserve, and the finish you must achieve. Lower grit numbers generally suit heavier removal; higher numbers suit finer blending and finishing, subject to the exact disc and application.
A fast weld-removal pass can leave a slow scratch-removal job. For workshop buyers and resellers, flap disc grit selection needs more than a number. Define the finished part first. This guide explains how to shortlist a grade, inspect between stages, and write a useful purchase requirement.
Illustrative scenario: A buyer needs painted steel brackets and visible stainless covers. The same grit on both order lines leaves two questions: how much stock can disappear, and what surface must remain? Both jobs involve weld blending. Their finish checks differ.
Key Takeaways
- Use 40, 60, 80, and 120 as task-led trial options, not guaranteed finish results.
- Inspect the previous scratch pattern before changing grades.
- Compare grain, shape, backing, and material suitability alongside grit.
- Define appearance and dimensional limits separately.
Explore our grinding and polishing options with your material and finish requirement in mind.
Flap Disc Grit Selection: Compare 40, 60, 80 and 120
Read grit separately from grain material
Grit describes the abrasive grade. Grain describes the abrasive material, such as aluminum oxide, zirconia alumina, or ceramic alumina. These are separate fields in flap disc grit selection. One does not settle the other.
Two products with the same number may behave differently.
Keep the supplier’s full grade marking on your inquiry and trial record. Check what the marking means before you shorten it. For flap disc grit selection, compare coarse and fine grades within a defined range. The number does not directly describe roughness or appearance.
Use the application chart as a starting point
The following chart applies the task bands in Weiler’s flap-disc guide. They are manufacturer selection guidance, not Oushke test results. Check that the exact product suits the job before trying a grade.
| Candidate grit | Task to investigate | Main tradeoff | Check before approval |
|---|---|---|---|
| 40 | Substantial stock removal or initial weld blending | Coarse scratches may need further work | Remaining thickness and scratch depth |
| 60 | Weld blending, deburring, or an intermediate stage | May remove more metal than a light finishing task permits | Burr removal without unwanted edge rounding |
| 80 | Finer blending or an early finishing trial | May be unsuitable for a large leveling allowance | Whether previous scratches disappear |
| 120 | Finer cleaning or finishing within the coated-disc range | Does not establish mirror polish or coating readiness | Required appearance and any measured finish |
Weiler also identifies 36 to 40 grit for heavy stock removal. Treat 36 as a coarse option only where the workpiece allowance and exact disc permit it. The same guide places weld grinding and blending around 40 to 60, rust removal and blending around 60 to 80, and cleaning and finishing around 80 to 120.
These bands overlap. Flap disc grit selection rarely gives one answer for all jobs. A small burr and a heavy weld bead need different removal decisions, even on the same steel component. Base flap disc grit selection on the starting condition rather than a workshop habit.
Name the endpoint before picking the first disc
Write down what counts as acceptable: a reference appearance, a drawing requirement, a coating supplier’s preparation requirement, or a specified measured finish. Keep each requirement explicit. A smooth surface can still be too thin. Check thickness as well as appearance.
For broader abrasive-family context, see our abrasive wheel and disc guide. Keep flap disc grit selection tied to coated flap discs rather than borrowing every rule from bonded wheels.
Weiler’s short manufacturer guide introduces coarse and fine grit choices:
Watch Choosing the Right Abrasive Grit if the player is unavailable.
Flap Disc Grit Selection for a Removal-to-Finish Sequence
Let each stage remove the previous scratch pattern
Start with the finish you need and work back. If substantial leveling is needed, consider a coarse starting grade. If the surface is already close to the requirement, trial a finer start. Flap disc grit selection should remove the defect and leave enough metal for later work.
An illustrative candidate sequence is 40, then 60, then 80 or 120. It is not a compulsory recipe. The starting surface, disc construction, and required finish decide which stages you need. XFlex’s grit-selection guide similarly treats grit choice as a balance between removal and finishing.
Inspect after each stage using the same viewing conditions. Record whether the earlier, deeper lines remain, whether the new pattern is reasonably uniform, and whether edges or contours have changed. If the original lines remain, merely making the surrounding area finer has not completed that stage.
Illustrative scenario: A bracket has enough stock for initial weld leveling, but deep lines remain after that pass. The buyer plans an intermediate blending trial before trying a finer grade. The decision is whether the earlier lines can be removed within the remaining allowance; no faster cycle or successful result is assumed.
Skip unnecessary stages only after inspection
Adding every available grit can create work without improving acceptance. Conversely, jumping directly from a coarse grade to a fine one may leave the fine abrasive working on scratches it does not remove effectively in that setup. Use inspection to guide flap disc grit selection instead of treating either approach as a rule.
For repeat orders, record the approved sequence with the exact product references. That turns flap disc grit selection into a repeatable instruction rather than a list of loose grit numbers. Check a replacement disc even if its label shows the same grade.
Know when to move beyond coated flap discs
A 120-grit flap disc does not promise a mirror finish. You may need a different system, such as a suitable surface-conditioning or polishing product. Choose that next process from the finish you need and the maker’s guidance. Don’t keep adding coated-disc stages without a clear goal.
Avoid assuming that paint will hide every line or that a finer appearance meets a coating specification. Check the coating system’s stated preparation requirement. Good flap disc grit selection includes a clear stopping decision: continue blending, move to another process, or accept the surface because the defined requirement has been met.
Why the Same Grit Can Behave Differently

Compare grain and construction as well as grit
Two 80-grit labels can describe different abrasive systems. Weiler’s guide treats grain material, disc shape, flap density, and backing as separate selection variables. These can change how the disc contacts the work, so grit alone is not enough for a supplier comparison.
Use the same flap disc grit selection fields for every quotation. Record the exact grain, flat or conical shape, density, backing, and product code. Ask for clarification when a seller substitutes a broad term such as “premium” for an actual specification. Do not assume ceramic always wins on every material or machine.
Confirm material approval and separate contaminated tools
Check that the disc suits the metal before flap disc grit selection. A steel trial does not establish suitability for aluminum or a particular stainless application. Ask the maker which metals and tasks the product suits.
Keep discs used on different metals apart where the job calls for it. A grit label does not prove that the disc is free of unwanted material.
For stainless appearance work, record the permitted finish and handling requirements with the grade. For aluminum, ask about the exact product’s suitability and loading behavior. Loading means material has accumulated on the abrasive working surface. A higher grit number won’t solve either issue by itself.
Check fit, mounting, guard and maximum speed
Check disc diameter, bore or mounting system, machine instructions, and the required guard. The machine speed must not exceed the disc’s maximum rated speed. Follow the exact disc and machine instructions for operating angle and use; this article supplies no universal RPM or pressure setting.
Norton’s flap-disc safety guidance addresses rated speed, condition, and correct use. Treat these checks as prerequisites to a trial, not matters that a grit number can override.
Our angle grinder collection provides machine-family context. Confirm the particular machine and accessory combination separately. For purchasing, attach those machine details to the flap disc grit selection record so a later substitution does not quietly change the setup.
Troubleshoot Scratches, Loading and Poor Cutting
Check the process before buying a finer disc
An unwanted surface does not identify its own cause. Use this flap disc grit selection table to plan checks. It cannot diagnose a disc from a description alone.
Pause if you’re unsure about disc condition or fit. Ask the maker before you continue.
| Observation | Possible issue to check | Next decision |
|---|---|---|
| Deep lines remain in a finer pattern | Previous stage incomplete or sequence unsuitable | Inspect the earlier scratches and remaining allowance |
| Disc cuts poorly and looks loaded | Product/material mismatch or accumulated material | Check product approval and condition; avoid improvised revival |
| Wear concentrates at an edge | Contact or operating angle may be unsuitable | Compare technique with exact instructions |
| Heat discoloration appears | Process may be unsuitable for the required surface | Stop and assess the part and process |
| Surface looks smooth but geometry has changed | Removal has exceeded the intended shape | Check dimensions before further abrasive work |
For the bracket example, flap disc grit selection should return to the remaining lines and material allowance. Moving straight to a finer grade would not answer whether the part can still be brought within its requirement. A rejected dimension cannot be restored by further blending.
Do not substitute wear for a finer grade
A worn coarse disc is not a controlled replacement for a new finer grade. Less cutting doesn’t tell you its grit or prove it is fit for use. Keep the approved product identity and replacement criteria in the work instruction rather than assigning worn discs a new grade by feel.
Do not burn away flaps, improvise dressing, or trim an unspecified backing to expose more abrasive. Remove damaged or uncertain discs from use and follow maker instructions. These checks support flap disc grit selection. Wear is not a way to set a known finer grade.
Our grinding-wheel markings guide explains label-reading context across abrasive families. Use the actual flap-disc label and instructions; do not apply bonded-wheel codes as an automatic crosswalk.
Specify and Trial the Disc Before a Bulk Order

Use an inquiry checklist
Write what must remain on the part as clearly as what must disappear. A useful inquiry ties flap disc grit selection to the metal, its current state, and the required finish. It should let a supplier identify a product without guessing the job from “general grinding.”
Include the following fields:
- Workpiece material and relevant grade, shape, and starting condition.
- Operation: leveling, weld blending, deburring, cleaning, or finishing.
- Candidate grit with its full designation, grain, shape, density, and backing.
- Diameter, mounting details, maximum speed marking, and grinder model.
- Required appearance, allowable material loss, and any drawing or coating requirement.
- Exact product reference, proposed sequence, and information needed before trial approval.
For available product discussions, send Oushke your material, starting condition, required finish, and machine details. Do not assume every grit or construction is available.
Record the trial at the same acceptance endpoint
Use comparable workpieces and record their starting condition. Before comparing discs, agree on three controls:
- Start from the same material and a similar defect or weld condition.
- Record the machine, disc setup, and inspection method used for each trial.
- Judge both processes at the same required finish and dimensional endpoint.
If a variable changes, record it. Don’t compare one disc after rough leveling with another after full finishing. They have not yet reached the same endpoint.
Keep rejected trials and their reasons in the record too. A failed trial helps rule out a grade for this job. It does not prove the disc will fail on other work.
| Trial record field | What to enter |
|---|---|
| Disc identity | Supplier, exact reference, grain, full grit designation, construction |
| Workpiece | Material, starting defect, relevant geometry and allowance |
| Setup | Machine, mounting, permitted operating conditions |
| Sequence | Grades used and reason for each change |
| Inspection | Earlier scratches, appearance, edges, dimensions, specified finish checks |
| Decision | Accept, rework, or reject against the stated requirement |
This blank record helps you plan a trial. It contains no test results. Add actual observations during your trial. Keep time and consumption records separate from disc-life claims until trial conditions and the endpoint are clear.
Approve substitutions against the full requirement
Illustrative scenario: A distributor receives two 80-grit quotations with different grain and backing descriptions. Rather than treating them as interchangeable, the buyer requests exact references and plans comparison against the same sample-part requirement. This example makes no claim about results, savings, or which disc is better.
Keep the flap disc grit selection record, accepted sample reference, and written specification with the order. Revisit flap disc grit selection when the work material, abrasive construction, or required finish changes. A matching number alone does not prove that a new disc will give the same result.
Questions About Flap Disc Grit Selection
The following questions address decisions that often arise between choosing an initial grade and approving the finished surface. Read the answers alongside the task chart and inspection record. Use the exact product instructions and the finish required for your job.
Is 40 or 60 grit better for weld removal?
Trial 40 grit where substantial removal is needed and the part has enough allowance. Consider 60 where blending or a smaller removal requirement matters more. Weiler places weld grinding and blending around 40 to 60 grit. The better starting point depends on the weld, remaining geometry, and required final surface.
Can I use one flap disc grit for the whole job?
Possibly, if that grade removes the defect and meets the required surface without excessive material loss. Flap disc grit selection should not assume one disc must do everything. Inspect the finished part against the agreed requirement; add another stage only when it solves a remaining scratch or finish problem.
Can 120 grit produce a mirror finish?
A 120-grit coated flap disc does not guarantee a mirror finish. It is a finer option within the common coated-disc range, while the desired polish may require another abrasive or polishing process. Define the appearance reference first and choose the finishing system around that requirement, rather than the number alone.
Why are deep scratches still visible after a finer grit?
The finer stage may have refined the surrounding surface without removing the earlier lines. Check whether the previous stage was complete, whether the sequence suits the material, and whether enough allowance remains. Flap disc grit selection needs an inspection decision between stages; changing grades by elapsed time alone leaves that question unanswered.
Does a worn flap disc replace a finer grit?
No controlled equivalence follows from wear. A disc that cuts less aggressively has not become a specified finer product, and its condition still needs assessment against manufacturer instructions. Use the required grade and an approved replacement rule. Do not continue using a damaged or uncertain disc to obtain a softer finish.
Choose the Starting Grit and Define the Stop Point
Begin with the defect and the allowed removal. Shortlist a suitable grade, check the product and machine combination, and inspect what remains after each stage. Accept the process only when the surface and geometry meet the written requirement. Grit describes one part of the process; it can’t certify the finished part.
For the buyer comparing brackets and visible covers, the useful outcome is a separate decision record for each requirement. Keep the starting condition, approved product reference, sequence, and inspection endpoint together. That record makes future orders clearer without pretending the illustrative examples are test results.
Practical flap disc grit selection ends with a defined surface and a repeatable purchasing specification. Contact Oushke with your material, finish requirement, and grinder model to discuss available options for your inquiry. Include the actual constraint you need to resolve, whether it is removal allowance, scratch blending, or a final appearance reference.


