
Cat’s Paw Nail Puller: How to Remove Embedded & Headless Nails
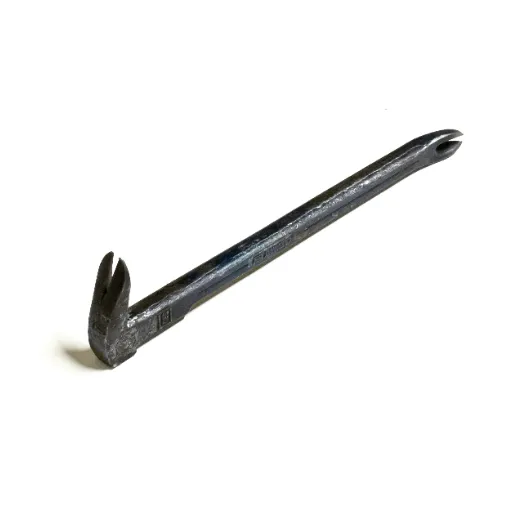
A cat’s paw nail puller is a short steel bar with a curved split claw and a flat striking heel, built to lever out nails that a claw hammer cannot reach. You drive the claw into the wood with a hammer, seat the V-notch on the nail head or shank, and rock the bar in small stages until the nail releases. This guide shows the full method, the trick for nails with no head left, how to pick the right size and claw, and how to repair the wood the tool leaves behind.
The nail is flush with the surface. There is nothing for a hammer to grab. You can scrape at it with a chisel for ten minutes, or you can reach for the one tool that was made for exactly this job.
Tomás, a salvage carpenter in Valencia, learned the difference on a vanload of 1930s pine he had been paid to reclaim. He started with a flat bar, which skated off every sunk head and split two boards before he gave up on it. Once he switched to a 10-inch cat’s paw, he cleared the whole load in an afternoon, driving the claw into the softer wood beside each head and rocking each nail free. The boards survived, and so did his fee.
For the full family of prying tools, from flat bars to wrecking bars, see our complete guide to pry bar types and sizes. We are Shanghai Oushike Hardware Tools, and nail pullers are one of the highest-volume tools we forge for distributors worldwide.
Key Takeaways
- A cat’s paw reaches embedded, flush, and headless nails that a claw hammer cannot grip. That is its entire reason to exist.
- The winning technique is to rock, never yank. Small back-and-forth movements break the nail’s grip fiber by fiber, while a straight pull splits the wood.
- Match the bar to the nail. A 6″ to 8″ bar gives control for trim, a 10″ to 11″ bar is the versatile default, and 12″ to 14″ is for heavy demolition.
- The claw matters more than the length. A sharp precision V-claw bites the shank and pulls headless nails, while a standard blunt claw needs an exposed head.
- The cat’s paw tears the wood around the hole, so plan to rehydrate the crushed fibers and fill, or pull the nail through the back on material you want to save.
What Is a Cat’s Paw (Nail Puller)?
A cat’s paw is a short, solid steel bar, usually round or hexagonal stock, whose end curves into a flattened, cup-shaped claw split by a sharp V-notch. The notch grips the nail, and the bar acts as a lever. The flat back, or heel, of the head is a striking face, so you can hit it with a hammer to drive the claw deep into the wood.
That striking heel is what separates it from almost every other small prying tool. As Wikipedia’s entry on the tool frames it, it is “essentially a small crowbar.” It is purpose-built for extracting nails, not for lifting or prying materials apart.
The naming trips people up, so here it is in one line: cat’s paw, nail puller, cat’s claw, claw bar, and nail claw all describe the same tool, though “nail puller” is also used as the umbrella term for the wider family of sliding pullers and specialty extractors. This article uses “cat’s paw” as the canonical name.
Cat’s Paw vs Nail Puller vs Wrecking Bar vs Nail Jack
Here is where the cat’s paw sits against the tools people confuse it with. The short version: the cat’s paw is the compact lever for nails you cannot see, the nail jack protects the wood better, and the wrecking bar is for scale.
| Cat’s paw (nail puller) | Wrecking-bar claw | Nail jack / sliding puller | End-cutting pliers | |
|---|---|---|---|---|
| Shape | Short bar, split V-claw, striking heel | Long gooseneck bar | Vertical slide-hammer over a foot | Pliers dies |
| Length | 6″ to 14″ (Japanese 7″ to 30″) | 12″ to 60″ | 10″ to 18″ | n/a |
| Leverage | Medium (short) | High | High (mechanical slide, not a lever) | Very low |
| Reaches | Embedded, flush, headless nails | Exposed nails, prying | Flush and below-surface nails with less damage | Only exposed nails and staples |
| Damage to wood | High if misused | Moderate to high | Low | Low |
| Can be struck? | Yes, on the flat heel | On the flat heel only | No | No |
| Best for | Embedded and headless finish nails, demolition, salvaging trim | Form stripping, framing and deck demo | Flooring and finish work where the wood must survive | Exposed nails, staples, broken stubs |
The cat’s paw wins on reach and loses on finesse. A wrecking bar has far more leverage, but you would not use it to rescue a piece of molding. For the heavy end of the family, see our guide to the wrecking bar and how it handles form stripping and framing demolition.
How to Remove an Embedded Nail with a Cat’s Paw
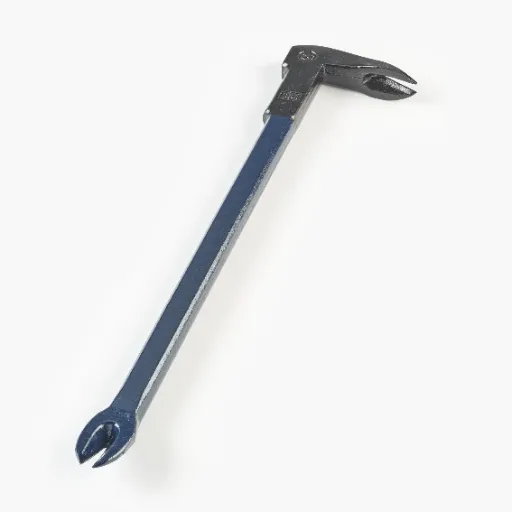
This is the sequence that works, and it is the sequence most guides skip past in a single line. Eye protection is not optional, because the claw can chip or the heel can mushroom when it is struck. Laying a scrap of wood under the tool, as HomeTips recommends, keeps the bar from gouging the surface as it levers.
- Protect the workpiece and yourself. Wear eye protection and gloves, work in good light, and slide a scrap of wood under the tool so the bar does not scar the surface.
- Expose a grip point. If the head is fully sunk, drive the claw into the wood right beside the nail with a hammer on the heel. Or chip a little wood away with a chisel to raise the head enough to grip.
- Seat the V on the nail. Rock the bar so the V-notch bites the head. On a precision claw, let it bite the shank instead.
- Rock, do not yank. Move the bar back and forth in tiny increments so the nail breaks the wood’s grip fiber by fiber. A straight pull splits the board.
- Finish with the hammer’s claw. Once the head is proud of the surface, a few short pulls with a claw hammer or the bar’s second end will walk it out.
- Re-inspect the claw. After heavy pulls, check for chips or a mushroomed heel, and retire a chipped tool.
For the general prying technique and safety habits that apply across every bar in the family, our guide to how to use a pry bar safely covers the body mechanics and the fulcrum tricks.
How to Remove a Nail With No Head (Headless and Flush Nails)
This is the case that sends most people searching, and the case almost no guide answers. A headless or broken nail has nothing to grab, so you have to either create a grip point or pull the shank directly.
- Bite the shank. A Japanese-style bar with a thin, precision-honed claw is built for this. Drive the claw into the wood alongside the nail until it bites the shank, then rock.
- Pry the stub proud, then grab it. Work the stub just above the surface, then finish with end-cutting pliers or nippers, which get a clean grip on a short stub.
- Chisel the head free. If the head is sunk but intact, chip the surrounding wood away until the head sits high enough for the V to seat.
- Pull from the back. On trim you plan to reuse, drive the nail through from the far side so the finished face is never touched.
Cat’s Paw Sizes: 6″ to 14″ (and Japanese Bars)
Cat’s paw nail puller sizes run from about 6 inches for fine work to 14 inches for heavy demolition, with Japanese-style bars offering a precision claw across a similar range. Here is the ladder.
| Size | Metric | Approx. weight | Claw character | Best for |
|---|---|---|---|---|
| 6″ | ~150 mm | 0.25 to 0.5 lb | Small precision V | Fine trim, cabinets, tight gaps, upholstery staples |
| 7″ | ~180 mm | 0.4 to 0.6 lb | Precision claw | Casing and smaller finish nails, tight access |
| 8″ | ~200 mm | 0.5 to 0.9 lb | Standard, or restorer’s wafer tip | Trim, small embedded nails, molding salvage |
| 10″ to 10.5″ | ~254 to 267 mm | 0.6 to 1.2 lb | Standard, most versatile | General work, crate and box dismantling |
| 11″ | ~280 mm | 0.8 to 1.4 lb | Molding puller, dual strike zones | Molding, casing, mid-duty embedded nails |
| 12″ | ~305 mm | 0.9 to 1.5 lb | Standard or Japanese double-ended | Tougher embedded nails, general demolition |
| 14″ | ~355 to 360 mm | 1.4 to 1.8 lb | Longer bar, heavy claw | Heavy demolition, large nails, maximum leverage |
| Japanese 180 to 360 mm | 7″ to 14″ | varies | Forged flat precision claw biting the shank | Headless nails, finish salvage, minimal wood damage |
Three rules make the choice simple:
- A longer bar gives more leverage but leaves a bigger hole. A 14-inch bar rips out a large nail fast but scars the wood, while a 6 to 7-inch bar gives you control.
- Choose the claw before the length. A sharp, precision V-claw bites the shank and handles headless nails. A standard blunt claw grabs heads and needs one exposed.
- The 10 to 11-inch bar is the versatile default. If you buy one, buy that size.
For how the cat’s paw sits inside the wider leverage ladder, the full pry bar sizes and lengths chart maps every bar length to the jobs it does.
Choosing the Right Cat’s Paw (Size, Claw, and Handle)
Start with the nail. For trim and cabinet work in tight spaces, choose a 6 to 7-inch bar. For general dismantling and crates, a 10 to 11-inch bar. For heavy demolition and large nails, 12 to 14 inches.
Then pick the claw. Precision V bites the shank and handles headless nails, while a standard claw needs an exposed head. A restorer’s model with a wafer pry tip is the one to carry if salvaging trim is the job, and a double-ended bar lets you start and finish a pull without switching tools.
Cat’s Paw Steel and Build Quality
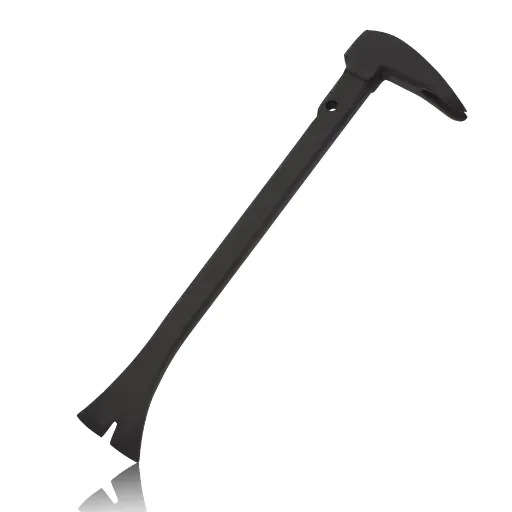
Almost every retail cat’s paw is forged from high-carbon steel, which is the baseline for a tool that has to take a hammer strike. Better bars add heat treatment, especially on Japanese-style precision claws, where the thin blade has to hold an edge without going brittle. A few premium models use titanium for weight savings.
Look for a hardened, flat striking heel, because that is the part you hit, and a finish that resists rust: black electrophoretic coating, powder coat, or enamel. The claw geometry is the detail that matters most. A properly forged V-notch stays sharp and keeps its grip, while a cheap cast claw flattens and skates off the head after a few pulls.
When NOT to Use a Cat’s Paw
The cat’s paw is a demolition and salvage tool. It is the wrong choice in three situations.
- Finish work you cannot repair. The claw tears the wood around the hole. If the surface has to stay perfect, use a restorer’s cat’s paw, pliers, or pull the nail through the back.
- Barbed flooring cleats. A cat’s paw damages the tongue. Use pliers instead.
- Anything a nail jack handles with less damage. When the wood must survive, a sliding puller’s vertical action beats a lever every time.
How to Repair Wood Damaged by a Nail Puller
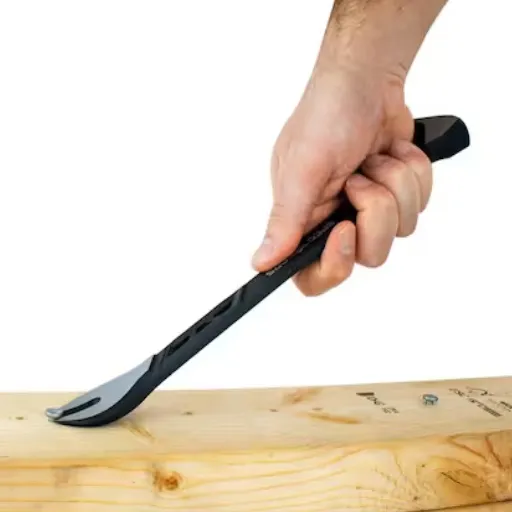
This is the section most guides leave out. The cat’s paw’s one real downside is the torn, crushed wood around the hole, and it is entirely fixable.
- Rehydrate and raise. Dab the crushed fibers with a damp cloth and let them swell, then sand lightly.
- Fill the hole. Use wood filler matched to the species for stained work, or a sawdust-and-glue mix for repairs you plan to paint.
- Sand and feather. Flatten the repair into the surrounding surface before you finish it.
- Prevent it next time. A restorer’s cat’s paw, a scrap-wood cushion under the bar, or working from the back all reduce the damage.
Cat’s Paws for Professionals and Resellers
For a supplier, the cat’s paw is one of the best-value SKUs in the whole pry bar family. It is cheap to make, it sells in multiples to framing crews, salvage yards, and pallet recyclers, and it wears out fast enough to generate repeat orders. The global hand tools market is projected to grow from about US$25.6 billion in 2025 to US$34.5 billion by 2033, and the demolition end of it turns over steadily.
At Oushike, we manufacture cat’s paws and nail pullers to order: bar length in millimetres, stock section (hex, round, or rectangular), claw geometry and V width, heat treatment, the striking heel, and the finish. We add your logo and packaging, and we keep MOQs flexible so a first order can be a test order. If you are building a nail puller line or a private-label range, talk to our team about specs, samples, and minimums.
Cat’s Paw Nail Puller FAQ
What is a cat’s paw tool used for?
A cat’s paw nail puller removes embedded, flush, and headless nails that a claw hammer cannot reach. It levers the nail out after driving the claw into the wood beside it. It is also used to dismantle crates, pallets, and formwork.
How do you remove a nail with no head?
Drive a precision claw into the wood until it bites the shank, then rock the bar to pry the stub proud. Finish by grabbing the stub with end-cutting pliers, or pull the nail through the back on trim you want to save.
Can you hit a cat’s paw with a hammer?
Yes, but only on the flat heel of the head. Never strike the thin claw, which can chip. A chipped claw no longer grips, and the chip can fly off, so retire the tool once it is damaged.
What size cat’s paw should I get?
A 10 to 11-inch bar is the versatile default for general work. Choose 6 to 8 inches for trim and cabinets, and 12 to 14 inches for heavy demolition and large nails.
Is a cat’s paw the same as a nail puller?
Yes. Cat’s paw, nail puller, cat’s claw, claw bar, and nail claw all name the same tool. “Nail puller” is also used as the umbrella term for the wider family, including sliding pullers and specialty extractors.
Does a cat’s paw damage wood?
Yes. The claw tears and crushes the wood around the hole. You can repair it by rehydrating the fibers, filling, and sanding, but on material you cannot replace, use a nail jack or pull the nail through the back instead.
Conclusion
A cat’s paw nail puller is the answer when the nail has no head left to grab. Expose a grip point or let the claw bite the shank, rock the bar instead of yanking it, match the bar to the nail, and repair the wood afterward. Then check the forging, because a cat’s paw is only as good as the steel behind its claw.
Erik, a distributor in Rotterdam, rebuilt his nail-puller range around exactly that logic. He stocks three bar lengths and two claw types under his own label, and he tells his buyers which claw handles headless nails. Repeat orders followed, because contractors kept coming back for the size that worked.
If you are sourcing cat’s paws or building a private-label range, we are glad to help you get the spec right the first time. Talk to our team about lengths, claw geometry, steel, and minimums, or start with the full guide to pry bar types.