
How to Install, Replace, and Remove Zerk Fittings: A Complete Industrial Guide
To set up a Zerk fitting, clean the threaded hole, snugly install the fitting about perpendicular to the surface by hand, and finally tighten roughly a half-turn using a wrench until the hex base contacts the surface. Replace it by matching the thread type and angle; once the old fitting is removed, install the new one accordingly. If flush, extract it with a screw extractor, left-handed drill bit, or Torx bit to avoid the thread damage.
Jake, Midwest supervisor of the fleet maintenance for one construction entity, found after having the Friday inspection of the routine of the three Zerk fittings that were broken. The next weekend would be an overnight shift for everyone in his team, and all ensuing excavators would have to be given grease before the Monday program was about to start. Jake didn’t have the specific thread gauge, so what he did was, he just guessed the size of the threads, cross-threaded a nearly new fitting, and banged the fitting in half. This one little mistake cost him and his team four hours of downtime and a rush order for specialty parts. This happens every day in repair shops and at job sites around the world, but luck is on our side: Most problems with Zerk fittings are preventable with a little know-how and technique.
In this guide, the processes of mounting, replacement, and elimination of Zerk fittings are succinctly discussed in all their phased outlines. There is an exhaustive review of all approaches to picking or pressing in of threads, dropping or breaking of fittings, thread identification, and the elements for selection of materials for fitting. Application of the ways mentioned will be fit for the maintenance of heavy equipment, parts distribution business, or manufacturing facility. Also, follow-ups happen to be provided so as to enable immediate use. For an in-depth insight into grease gun fittings, couplers, and accessories, check our complete guide to grease gun fittings.
Key Takeaways
- Turn with a hand a few revolutions, and then wrench tight to about 1/2 turn beyond what may be fingers tight to avoid splitting.
- The most popular thread style along the North American landmass is the 1/4″-28 UNF, while the metric accessories normally use M6x1 or M8x1.25.
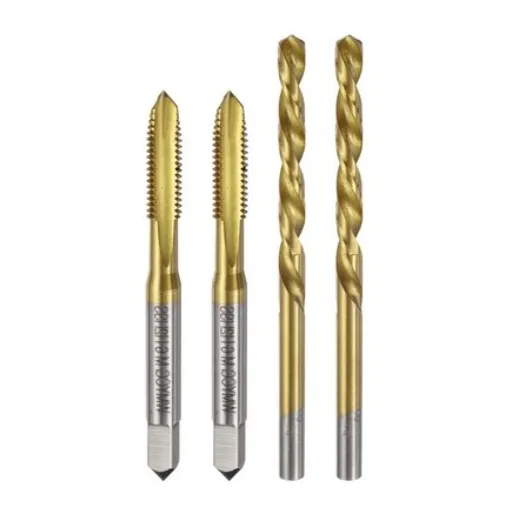
- For removing broken zerks, one can apply screw extractors, a left-handed drill, maybe, or the right size of Torx bits.
- Match the fitting material to the environment: carbon steel for general use, 316 stainless steel for marine or food processing, and brass for non-sparking applications.
- Volume pricing begins at approximately $0.02 per piece, based on nearly 1,000 quantities of plain carbon-steel fittings, in making up carton assortments that maintenance teams keep in their supply inventory.
What Is a Zerk Fitting and How Does It Work?
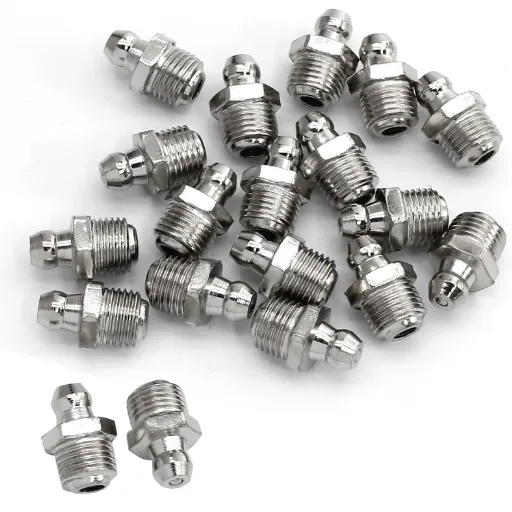
Greasing equipment is made easy with a Zerk fitting, a rather microscopic component and sometimes mistaken for a simple bolt; it is threaded, enabling a point instead of an open-ended fitting into bearings, joints, or other parts of a machine which operates by a grease gun. Inside of it, there is a lapping ball check valve that allows grease to get in when there is pressure and then closes to protect against any dirt, water, or other elements getting in.
This was named by the designer, Oscar Ulysses Zerk, an engineer from Austria, who invented and, in 1929, patented such a valve. Zerk disembarked in 1907 and, in due course, formed Allyne-Zerk Company in Cleveland, Ohio. By the year 1928, Henry Ford had indeed included Zerk’s fittings in his Model A cars. In only a few years, the Zerk fitting was used in roughly 99% of the manufactured cars. The concept underwent hardly any change for almost the whole century because it was effective.
Attaching the coupler of the grease gun to the fitting compresses the spring, thereby allowing the internal ball to move back. Grease is then able to travel into the bearing or joint. In the event that the coupler is detached, the ball is pushed back into the outlet by the spring thus closing the seal. The device is thus effective in preventing dirt from entering the lubrication system, while keeping the lubricant within the system.
Zerk Fitting Types and Thread Standards at a Glance
Before you install or replace a fitting, you need to understand the type and thread standard you are working with. Using the wrong fitting or forcing an incompatible thread will damage the component and create leaks.
Common Fitting Types
Straight fitting style is the most common among all the types. Such fittings are perpendicular to the surface to which they are mounted, and they work well when easier access is provided by a grease gun to the lubrication spot. An angled fitting of either 45 degrees or a 90-degree variation, this solves problems concerning accessibility in tight compartments such as behind shields or between frame rails. Button head fittings usually have a flat, broader head that can handle high pressure and volume, and these usually require a slide-on coupler. This type of fitting is known as flush fittings when they are in level with the surface, while the rivet is recessed into the round hole so that very minimal protrusion. Drive-type or press-in fittings are fitted with serrated shank heads that are hammered into a plain and untapped hole.
Thread Standards
Thread compatibility is non-negotiable. Metric and imperial threads are not interchangeable. Cross-threading will destroy both the fitting and the mating hole. See our metric vs imperial grease fittings comparison for a complete cross-reference table and regional usage guidance.
| Thread Standard | Size | Common Application | Region |
|---|---|---|---|
| UNF | 1/4″-28 | Automotive, trailers, general machinery | North America |
| NPT | 1/8″-27 | Hydraulic and high-pressure systems | North America |
| Metric | M6x1.0 | Light to medium machinery | Europe, Asia |
| Metric | M8x1.25 | Heavier industrial equipment | Europe, Asia |
| UNF | 5/16″-24 | Compact or specialty applications | North America |
| UNF | 3/8″-24 | Heavy-duty industrial equipment | North America |
Imperial thread standards follow SAE J534, while metric equivalents conform to DIN 71412 and ISO specifications. For a deeper breakdown of each head style, pressure rating, and application match, see our complete guide to grease fitting types.
How to Install Threaded Zerk Fittings
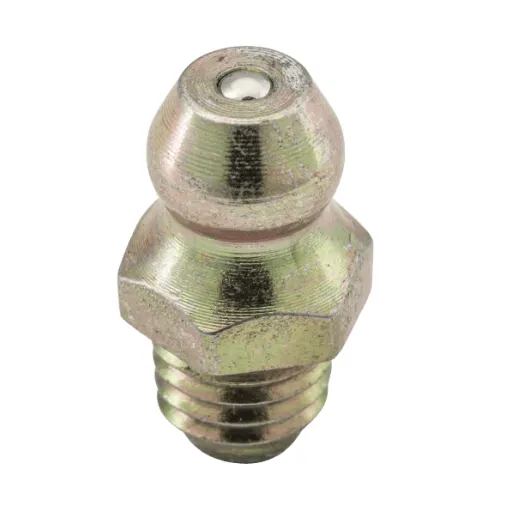
The easiest part of installing a threaded Zerk fitting takes approximately half a minute: the most difficult, several hours. Just follow some steps each time you do it.
Step 1: Clean the Threaded Hole
Get rid of the old thread sealant, garbage, and hardened grease. Take out a thread chaser or clean tap if the threads are destroyed. Regularly, contamination is the major cause of messing up the threading and leakage.
Step 2: Hand-Tighten Perpendicular to the Surface
Start screwing the fitting by hand. This should thread easily with very light finger pressure. If you sense resistance immediately, stop. You may have the wrong thread type, or the threads may be damaged. Do not turn a fitting for the first few curls with a wrench.
Step 3: Wrench-Tighten to the Correct Torque
Use an open-end wrench or grease fitting tool to tighten the fitting about a half-turn beyond finger tight. The hex base will be flatly forced against the plane being mounted to. Do not overtighten the fitting; in fact, overtightening is the primary cause of broken fittings.
Step 4: Test with a Grease Gun
Attack your grease gun and take the pump out a little. In the scope of the base of the fitting, check for leakage. If the thread oozes grease, tighten slightly or remove the fitting and reapply the sealant.
Torque Reference Table
| Material | Recommended Torque | Notes |
|---|---|---|
| Carbon steel into steel | Hand-tight plus 1/2 turn | Standard for most applications |
| Carbon steel into aluminum | Hand-tight plus 1/4 turn | Softer material requires less torque |
| Stainless steel into steel | Hand-tight plus 1/2 turn | Slightly more torque may be needed |
| Brass into aluminum | Hand-tight plus 1/4 turn | Very soft; easy to over-tighten |
Tom, a heavy equipment mechanic with fifteen years of experience, learned about over-tightening the hard way. He was rushing through a routine service on a Caterpillar 320 excavator and cranked a 1/4″-28 UNF fitting into a track roller with a full turn past hand-tight. The fitting snapped at the hex base, leaving the threaded shank buried in the housing. His afternoon service turned into a three-hour extraction job. The lesson is simple: snug is enough.
How to Install Press-In (Drive-Type) Zerk Fittings
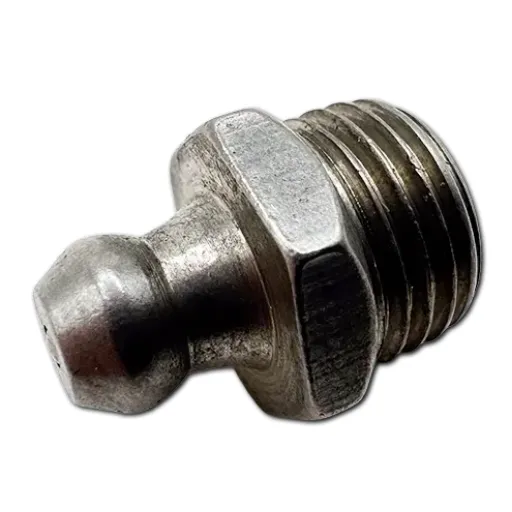
Press-in or drive-type fittings do not use threads. They rely on a serrated or barbed shank that creates an interference fit in a smooth bore. These fittings are common in sheet metal applications, soft castings, and retrofits.
Step 1: Verify the Bore Size
Measure the hole diameter with calipers. The bore should match the shank diameter of the fitting within a few thousandths of an inch. A hole that is too large will produce a loose fit. A hole that is too small may crack the housing.
Step 2: Use a Drive Tool or Socket
Place a properly sized drive tool, socket, or grease fitting installation tool over the head of the fitting. Do not strike the fitting directly with a hammer. Direct impact can deform the ball check valve or crack the housing.
Step 3: Tap Until Fully Seated
Use a tool to beat with a hammer and is hard up to mount on surfaces. The odd thing yet again, when you are gripping by the head, it should be stuck, math and glue.
Step 4: Test with a Grease Gun
Apply the grease gun with instruments in the outlet number; then lead into the bore signs that there is there maybe that the tubing is not completely equipped with the bore yet a suspected condition.
How to Replace an Old or Damaged Zerk Fitting
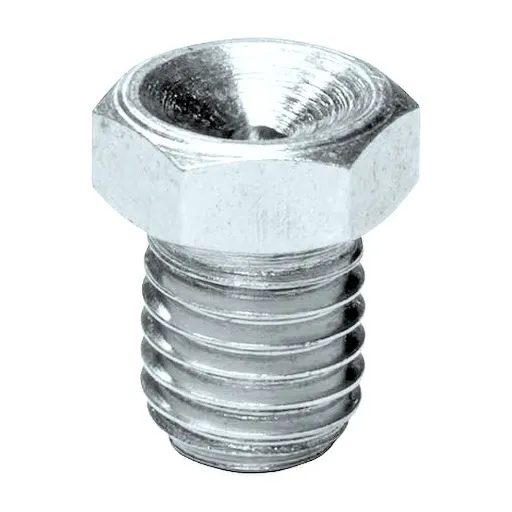
Fitting the zerk fitting can be very simple if you happen to possess the same replacement. Quite a good component to this new challenge is figuring out the correct standard and necessary type of thread when the old fitting has corroded, been beaten, or gone missing.
Replacing Threaded Fittings
Simply unscrew the old fitting with the aid of either a wrench or a socket. Clean the threads in holes with a meticulous brush, like the wire brush and thread chaser. Now, install a new one following a detailed four-step thread process above and always matching the thread type, angle, and overall length of the original fitting.
Replacement of Drive-In Fittings
Grasp the body of the old fitting through the locking pliers, and by twisting, break the grip fit. Once broken, simply tug it upward. If it cannot be pulled out due to adhesion, gently bring out the claw of a hammer and crack it. You may also use a second hammer to tap the claw for added advantage. Place the new fitting to install a new fitting.
When the Old Fitting Is Missing
When the fitting is gone and the size is unknown, the determination of the thread or bore is necessary. Refer to the threaded-identification section below for a step-by-step account.
How to Remove a Broken Zerk Fitting
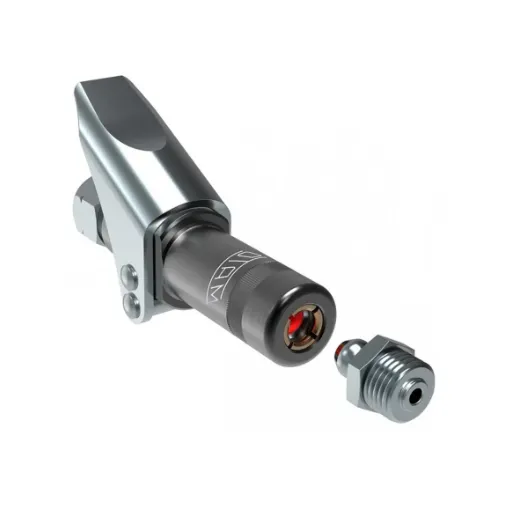
It is really frustrating when you break a Zerk fitting while working on your equipment. There is nothing to grip because the head snaps off, leaving the threaded shank stuck in the hole. Here are the most efficient removal methods, from least to most invasive:
Method 1: Screw Extractor (EZ Out)
It is almost always used. Take a center punch and make a small dimple in the center of the broken shank. To start tapping a small pilot hole, use a left-handed bit for drilling into the shank. Insert the screw extractor into the hole and turn it counter-clockwise by tapping for a few seconds with a tap wrench or adjustable wrench. Apply continuous pressure. Avoid using high-speed drilling for the operation unless necessary. Overloading it might break the extractor itself, which is a very brittle thing.
Method 2: Left-Handed Drill Bit
Using a left-handed drill bit will often dig into the broken piece, moving it back while drilling. This is important if the small broken piece is not rusted and bound together. Slowly rotate the drill and provide additional cutting fluid while executing this method.
Method 3: Torx Bit
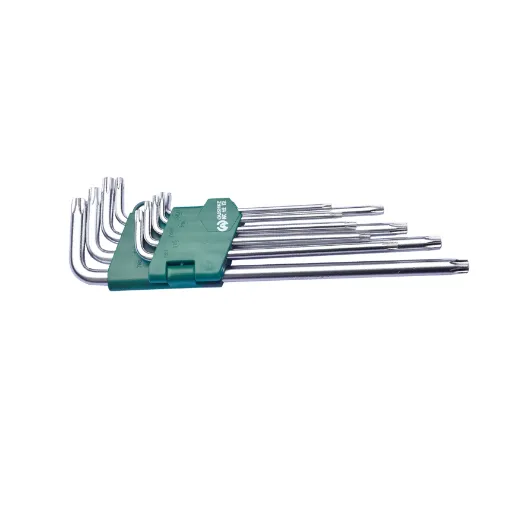
Choose a Torx bit that fits snugly into the broken shank. Use a hammer to drive the bit into the specific fitting and tighten it up. Then turn the shank with a wrench. In some cases, where the Torx bit is about to lock, have been proven to grasp better than a typical removal screw in some tests.
Method 4: Dremel or Carbide Burr
For the absolute worst cases, in which the thread must be maintained, a slot should then be ground very carefully in the breaking shank with the help of a Dremel tool and a carbide burr bit. Insert a flat-bladed screwdriver and turn it counter-clockwise. Proceed slowly and be sure that the slot remains even. This avoids excessive slot effects to the threads in the housing.
What If the Extractor Breaks Off?
If a screw extractor snaps inside the broken fitting, you have a serious problem. Extractors are hardened steel and cannot be drilled with standard bits. Your options include welding a nut onto the exposed extractor and turning it out, or carefully grinding out the extractor and remaining fitting with a carbide burr. In many cases, the only reliable solution is to drill out the old threads and re-tap the hole to the next larger size.
Pro tip: Cover the surrounding area with a rag or magnetic shield before drilling. Metal shavings from the extraction process can contaminate bearings and joints. After installing the new fitting, pump extra grease through the joint to flush out any debris.
How to Identify the Correct Zerk Fitting Size
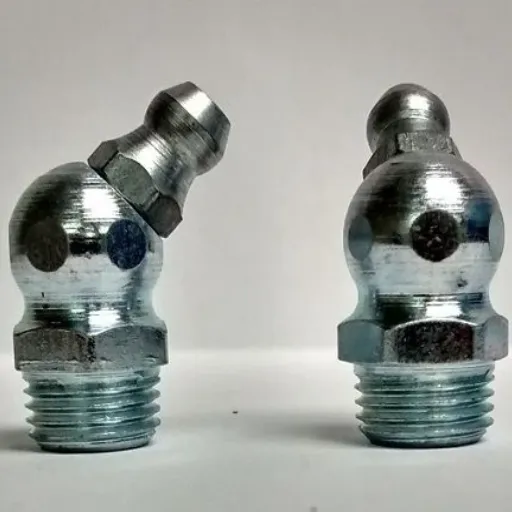
Ordering the wrong fitting wastes time and money. Use this five-step process to identify the exact size and type you need. For a complete thread size chart with measurement instructions, see our grease fitting sizes guide.
Step 1: Measure the Outer Diameter
Use digital calipers to measure the outer diameter of the threaded shank. Write down the measurement in both inches and millimeters.
Step 2: Check the Thread Pitch
Use a thread pitch gauge to count the threads per inch for imperial fittings, or measure the millimeter spacing for metric fittings. A 1/4″-28 UNF fitting has 28 threads per inch. An M6x1.0 metric fitting has threads spaced 1.0 millimeters apart.
Step 3: Check for Taper
Hold a straight edge against the threads. If the threads narrow toward the tip, you have a tapered pipe thread, such as NPT. If the threads run parallel from base to tip, you have a straight thread, such as UNF or metric.
Step 4: Measure the Ball or Head Size
Measure the diameter of the ball or head to confirm coupler compatibility. Standard hydraulic Zerk fittings use a smaller head than button head fittings. Using the wrong coupler will damage the fitting.
Step 5: Note the Angle
Check whether the fitting is straight, 45-degree, or 90-degree. The angle determines how you will access the fitting with a grease gun.
Quick Reference Table
| OD Measurement | Likely Thread | Angle | Common Application |
|---|---|---|---|
| 0.250″ / 6.35 mm | 1/4″-28 UNF | Straight | Automotive, trailers |
| 0.236″ / 6.0 mm | M6x1.0 | Any | European machinery |
| 0.315″ / 8.0 mm | M8x1.25 | Any | Industrial equipment |
| 0.405″ / 10.3 mm | 1/8″-27 NPT | Straight | Hydraulic systems |
Choosing the Right Material for Your Environment
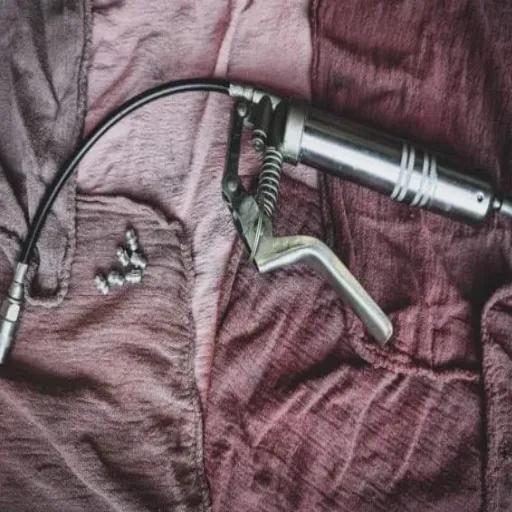
The material of your Zerk fitting directly affects corrosion resistance, durability, and total cost of ownership. Choosing the wrong material leads to premature failure, seized fittings, and increased maintenance costs. For a complete decision framework covering application matching, pressure requirements, and environmental factors, see our guide to choosing grease gun fittings.
Zinc-Plated Carbon Steel
Carbon steel is considered to be the typical material for general applications. It provides enough resistance to corrosion and oxidation for indoor and sheltered outdoor use. Moreover, carbon steel plumbing fittings are the cheapest and most common type one could find. They are the right choice for all-purpose construction, automotive, and agro equipment when the situation inclines to limited moisture and chemical exposure.
Stainless Steel (304 and 316)
The award-winning benefit of stainless steel fittings is the fact that it resists corrosion even in the worst of environments. Grade 304 is really suitable for food-processing or chemical plants, boat installations, and general marine-oriented applications. Grade 316 also offers much better capabilities against saltwater and chloride environments. Thus, it becomes the preferred choice for offshore equipment, coastal machinery, and a range of marine purposes. A stainless-steel fitting is much costlier than carbon steel. And yet, depending on the fact that life becomes so long, the cost is justified.
Brass
Copper alloys are spark-resistant, which makes them preferable for sensitive industries such as petrochemical, mining, and explosive environments. They can also resist abrasion from use in freshwater conditions. Compared to steel, brass is considerably softer; hence, avoid exerting too much pressure.
Monel
Monel is an alloy of nickel and copper, consisting of various compositions to solidify at extreme marine and offshore environments and is hardly affected by the water of the sea. Monel fittings are an expensive variety and can be found only in specialty items and generally in underwater, heavily salt-exposed equipment.
Maria is a small business entrant in the auto parts section in Brazil. Last year, she changed from ordering 50-piece retail packs for grease fittings to purchasing 2,000 units straight from the factory. At one time, she stocked three assortments for general automotive carbon steel, 304 stainless steel for agriculture nearest the coast, and the other for a mining contractor: brass. As a result, her average price per fitting dropped from $0.35 to $0.04, and she started receiving more orders back because her customers started to believe that she always kept the particular part in stock every moment. Good material selection is the beginning of building trust and protecting margins.
Are you hunting around for tailor-made material specifications or private label assortment kits on your distribution line? Shanghai Oushike Hardware Tools offers several very flexible OEM solutions as far as custom packaging, branding, and material options are concerned, to make one that will be able to still match up with your market needs.
Common Mistakes That Damage Zerk Fittings
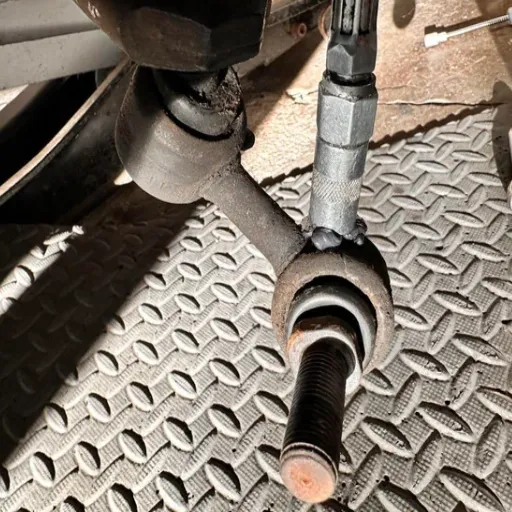
Even experienced mechanics make these mistakes. Avoiding them will save you time, money, and frustration.
Using the Wrong Coupler on Button Head or Flush Fittings
Standard hydraulic couplers do not seal correctly on button head fittings. Attempting to force a standard coupler onto a button head will deform the fitting, damage the coupler, and create a safety hazard. Always match the coupler to the fitting type. Learn how to select the right coupler for each fitting type in our grease gun coupler guide.
Cross-Threading Metric into Imperial (and Vice Versa)
Metric M6x1.0 threads look similar to 1/4″-28 UNF threads, but they are not compatible. Forcing a metric fitting into an imperial hole will destroy both the fitting and the threads in the housing. When in doubt, use a thread gauge.
Over-Tightening
Over-tightening is the single most frequent reason for broken fittings. The thread by hand, followed by a half turn with the wrench. Just enough torque. Seals against too much force, from the extreme precision-machined threads in the hex base, interacting with the surface.
Ignoring Pressure Ratings
Standard Zerk fittings are rated for 8,000 to 10,000 pounds per square inch (PSI). Nozzle-type fittings, on the other hand, can withstand 10,000 to 15,000 PSI. Forcing anything other than these limits can have the fitting dislodged, while strenuous applications can make the fitting fail or leak.
Neglecting Corroded Fittings
A corroded fitting is a seized fitting waiting to break. Inspect fittings regularly and replace them at the first sign of rust or pitting. It takes five minutes to replace a fitting proactively. It takes two hours to extract a broken one.
When to Buy in Bulk: A Quick Note for Maintenance Teams and Distributors
Fleet owner, maintenance shop operator, or parts distributor reduces downtime and increases margins by maintaining a well-stocked inventory with Zerk fittings.
Typically, standard carbon steel grease nipples cost $0.01 to $0.05 each with bulk orders of 1,000 or more pieces. Stainless steel components usually add a premium of 10x to 20x, yet they last considerably longer in harsh environments. Materials that are routine to most manufacturers start at minimum order quantities of 500 to 1,000 pieces.
Instead of stocking replacement fittings, a mix of straight fittings and those at angles of 45 degrees and 90 degrees equipped to common-thread-sizing, the majority of cases are generally good enough. For distributors, customer-specific assortment kits in their own branded private-label packaging generate repeat sales and brand loyalty in the end user.
Factory direct sourcing eliminates a distributor markup and provides direct access to technical support, customized specifications, and stringent quality control. For maintenance teams, the savings they achieve in buying large quantities will often pay for the first investment during the first several replacement cycles.
Conclusion
Zerk fittings are small components with a disproportionately huge impact on the reliability of equipment. They can be put on in seconds and take hours to remove, at which point it becomes clear whether the mechanic or the technician was up to the task.
Remember these basic tenets. Thread in fittings by hand, then put another half turn on them with a wrench. Be sure the threads match completely. Install them using the right material for the environment. Replace corroded ones before they break. Plus, remember to keep a neat inventory to have the right part at your fingertips every time.
Installers, maintenance gangs, contractors, and vendors all agree that a good Zerk fitting strategy reduces downtime, slashes expenses, and gives more working hours to equipment. That is making the kind of operational efficiency that can protect margins and promote long-term dependence.
Ready to source reliable Zerk fittings for your business? Contact Shanghai Oushike Hardware Tools today for factory-direct pricing, custom specifications, and OEM solutions tailored to your market.